How To Make Friends In Community College

By Gage Hanson

How To Make Friends In Community College? We’ve all been there. Graduated from high school. In college. And away from all the friends from the last twelve years of school. You have to start over again and make new friends, something you haven’t had to do in a long time. Making friends at a community college is even more difficult because of the small campus, low number of students, and high turnover rate. However, a lot of the strategies used for making friends on a bigger campus can be repurposed so you can make friends in community college.

Making friends in Community College starts in the classroom

It All Starts In The Classroom

The easiest place to start friendships is the classroom. You have to show up. 30 or so classmates have to show up. The recipe for making friends is already half done. Now, it is time for you to make an impression.

            First off, don’t sulk to the back corner of the classroom on the first day. Don’t isolate yourself just because you don’t know anybody. Nobody in that first class is going to know each other. Sit near the front of the room and close to someone else. Right when you sit down, introduce yourself to the person closest to you. You may never talk to them again, but knowing someone else’s name and them knowing your name will take a lot of pressure off of your search for friends. First introductions are done with. Second and third introductions will be much easier.

            Secondly, answer some of the teacher’s questions and join in on discussion groups. You probably have a lot of experience in classes where silence dominates most of the class time. If you become the student who keeps those awkward silences away, your classmates will get to know you. You don’t have to be the know-it-all who answers every question, but speaking up once or twice each class period will make yourself memorable. Making friends and starting introductions is much easier when classmates already know who you are. And they will be thankful you are answering questions so they don’t get called on.

Making friends in Community College happens in campus groups

Campus Groups

This strategy for making friends is definitely handcuffed in a community college environment, but that just means you have to get a little more creative. Thankfully, the internet makes that even easier.

            Every college campus has group activities. Big or small, the school will have a web page listing all these activities and campus groups. Here is an example of my alma mater’s activity page. Searching “[school name] clubs and organizations” will lead you to this page. From there, it is as easy as finding something that interests you, and then showing up to participate. Participate is the key word here.

            You may think in a smaller environment like a community college that you will stick out like a sore thumb as a new member and you will, but in a good way. I guarantee that the club will welcome you with open arms. They don’t see many new members. All you have to do is show up and you will be the most popular member of the group for a few weeks. Definitely long enough for you to make some good friends. Group activities bring people together with similar interests. It is an automatic ice breaker.

            Another easy way to meet up with people that have similar interests is Meetup. While it doesn’t necessarily limit the group members to students of the community college, it does have a wide variety of groups and activities. If you aren’t clicking with any of your classmates, this is an option to try.

Required Readings

If you want to make friends at a community college, you have to leave your dorm and make appearances at campus events. As a freshman and sophomore in college, I had a fair amount of classes that required me to attend a reading or lecture that was outside of regular class time. It is a safe bet that one of your language or science classes will require the same thing. This is more opportunity for you to spend required time with classmates making friends.

            Ask your desk neighbor or some of your classmates which reading they are going to and make plans to attend the same one. Not only does going as a group make the lecture more bearable, but you have another built in similarity with your prospective friends. Nobody likes attending these lectures. Misery loves company and nothing helps you make friends more than shared misery.

Making friends in community college starts with you.

Making Friends Starts With You

Ultimately, it is up to you whether or not you make friends. Most of your classmates are going to be in the same boat as you. They are attending a small college while most of their friends are gone. They are just as lonely as you, especially if you are all freshman.

            The problem is that all of these classmates will be too scared or nervous to make the first move. That is why you need to be the one to make the first move. There is undoubtedly a huge percentage of people in each of your classes that are scared of the exact same things you are. They will be so relieved that you approached them first. You will automatically be in their good favor.

            A lot of the fear you face when making friends is unfounded and holding you back unnecessarily. Making friends at a community college is just like it was at any point of your schooling life. Remember those days when you’d invite the new kid over to your house to play Super Smash Bros. and eat pizza rolls? It is just as easy as it was then. Once you realize and accept that the worst thing that can possibly happen is them saying no and you moving onto the next person, you will be unstoppable. You will also quickly realize that everybody wants to have friends as much as you do.

            So go out there and start making friends.

Hope you enjoyed this Guide!


Hiking Gear for Plus-sized hikers

Do you love the outdoors and spending time hiking but have trouble finding gear to fit your larger frame? This guide is for you! This is a comprehensive list of Hiking Gear for Plus-sized hikers. Whether you are 300, 350 or 400lbs, I hope this list will help you find the gear that you need to get out there and enjoy nature. We have several guides for larger people so in addition to hiking gear, be sure to check out our ebike’s for heavy/overweight riders guide as another way to get outdoors!

Whenever possible, I try to link to gear that is NOT made in China to try and keep quality up.

Hiking gear needed for larger hikers

Most hiking gear does not need to be specialized for larger obese or heavy hikers. For example, you don’t need a special canteen or hydration system just because you’re a larger plus sized hiker. This guide focuses on equipment like clothing, backpacks, chairs, etc.

Hiking boots for plus-size hikers

Many larger people have wide feet or calfs and it can be tricky to find good hiking boots that accommodate plus-size hikers. Here are some hiking boots for people with wide feet or calfs.

Danner Crag Rat Boot

Danner Boots

Danner Boots are Made in the U.S.A and are a high quality choice for hikers. They are built solid and will handle the roughest terrain. Some of the best options include the Danner Crag Rat (pictured), the Mountain Light and the Light II but they have many different styles to choose from with wide widths for both men and women.

KEEN Durand II
The KEEN Durand II boot is available in wide widths

KEEN Boots

KEEN is another American shoe manufacturer that makes several wide width hiking boots. These boots feature a rugged design that will give your foot and ankle the support they need regardless of the terrain that you may traverse. KEEN options include the Durand II (pictured).

Chippewa Modoc boot
The Chippewa Modoc Boot

Chippewa Modoc

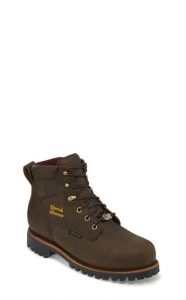
The Chippewa Modoc is made in the U.S.A. This sturdy boot comes in wide widths and provides a sturdy base for any plus-sized hiker. This classic hiking boot provides comfort and great classic looks for larger hikers needing a wide width booth.

Performance Clothing for larger hikers

In addition to footwear, it can sometimes be hard to find plus-size clothing for better performance when out in nature. Performance gear can help keep you warm and cool so you can keep going further. The following companies sell larger sizes for plus-sized outdoor enthusiasts.

The North Face

The North Face is one of the most iconic outdoor performance clothing brands. The company started out as a supplier of clothing for elite expeditions and the quality of their products was sought after around the world. Today the company supplies everything from jackets, pants and other accessories. The North Face has what it calls “extended sizes” for big and tall outdoor enthusiasts. Some items have sizes up to 4XL which will fit customers up to 400lbs.

The North Face’s Resolve jacket is available in extended sizes

The Resolve jacket is among The North Face’s offerings in jackets that provide protection from the weather and are available in extended sizes for plus size hikers and outdoor enthusiasts.

The North Face Arrowood Jacket

For colder weather, The North Face offers the Arrowood jacket in extended sizes. This one is only available up to 3XL which will cover most larger hikers or outdoor enthusiasts. It comes with a waterproof shell and an inside fleece component sure to keep you warm.

The North Face also has their 90s style Nuptse down jacket and Denali fleece jacket available for plus-size outdoor enthusiasts.

Columbia

Columbia has a complete line-up of clothing and footwear for larger individuals. Many of it is imported but sizes range up to 5XLT so plus sized outdoor enthusiasts looking to take a hike will find something to keep them warm or cool. Here is some of the performance gear that Columbia has for larger hikers and outdoor enthusiasts.

The Columbia Tryon Trail Shell

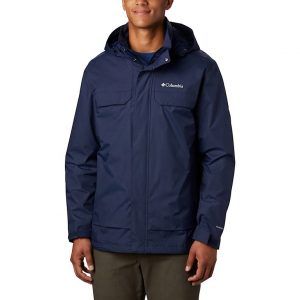
The Columbia Tryon Trail shell jacket is available in sizes up to 5XLT so it will fit the largest plus size hiker. The jacket can be layered to provide a warmer substitute in the colder months.

You can pair the jacket with a rain pant (also available up to size 5XL) and stay dry while you out out in the outdoors.

Columbia Basin Trail Full Fleece

Another option to pair the shell with or to wear it on its own is a fleece jacket. The Basin Trail Full Fleece is such a choice and is available in sizes up to 5XL.

The Columbia Tech Trail Crew Neck

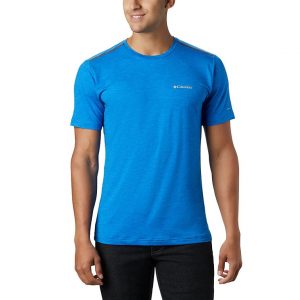
The Columbia Tech Trail Crew Neck is designed to wick moisture away from your skin and keep you cooler going down the trail. It also provides UV and sunscreen protection. It can be warn as a base layer or your main shirt when going for a hike. It’s available in sizes up to 6XL.

Columbia Silver Ridge II Stretch Pant
The Columbia Silver Ridge II Stretch Pant

The Columbia Silver Ridge II Stretch Pant is another performance layer to add to your outdoor gear arsenal. Like the shirt above, it provides UV and sunscreen protection. Articulated knees provide for flexibility and comfort. They are available in sizes up to a 54 waist.

Mountain Warehouse

Mountain Warehouse is another brand that carries outdoor gear for plus-size or larger hikers. They provide lots of performance wear options at very reasonable prices. While a lot of their offerings are imported, they are worth a look based on their low cost.

Mountain Warehouse Endurance T-Shirt

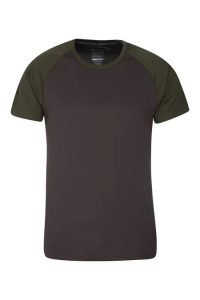
The Mountain Warehouse Endurance T-shirt provides UV and SPF protection as well as helping keep you dry and cool thanks to their Isocool technology. By wicking sweat away from your body it helps keep you cool so you can stay out longer.

Brisk Extreme Mens Waterproof Jacket

In addition to performance wear, Mountain Warehouse sells outer wear for plus-size hikers such as the Brisk Extreme Mens Waterproof Jacket. This jacket is fully breathable and features pit zips for extra ventilation where it counts if you know what I mean! It is available up to size 4XL.

The Mountain Warehouse Idris Full zip Fleece Jacket

An interesting addition to the outerwear options mentioned here, Mountain Warehouse has a line of full zip fleece jackets such as the Idris full zip fleece jacket. It’s available in sizes up to 4XL and is lightweight and breathable to make your journey down the trail more comfortable.

Performance Gear for Plus-size Hikers

We’ve covered footwear and performance clothing for larger hikers but what about gear? While larger hikers don’t need larger canteens or cookware, it is helpful to have backpacks, trekking poles and potentially sleeping bags designed for larger outdoor enthusiasts. Here are some suggestions for specialized gear for hiking for plus-sized hikers.

TrailBuddy Trekking Poles

For trekking poles I can’t recommend the TrailBuddy Trekking Poles enough. These lightweight poles are made of aluminum and will give you the support you need and help save wear and tear on your knees. An alternative would be the Foxelli Carbon Fiber Trekking Poles.

Teton Sports Explorer 4000 backpack for larger hikers.
Teton Sports Explorer 4000

Being properly equipped for a longer hike means having the equipment that will keep you safe. Ergonomics is important and having a properly fitting backpack is just as important as having a good pair of boots. This means having a too small backpack can also affect your balance and body’s musculoskeletal system. One larger backpack models include the Teton Sports Explorer 4000 which has a waist belt that fits up to 72″ and fits torsos up to 23″ so taller and larger backpackers.

Teton Sports XXL Sleeping Bag

Most hikers also like to camp in the back country at some point so it’s important to have the proper gear with you for shelter and warmth. While plus-size hikers don’t need a larger tent, having a larger sleeping bag is helpful to most of us to stay warm. Most sleeping bags for backpacking are made smaller and lighter but there are a few that are made wider and taller and for larger hikers. These include the Teton Sports XXL Sleeping Bag which will keep you warm down to 0 degrees. The bag is nearly 40″ wide which provide comfort to largest backpacker.

Conclusion

I hope this guide has helped plus-size hikers and outdoor enthusiasts find the gear that they are looking for or at least some direction on what to look for – Hiking Gear for Plus-sized hikers. This guide is part of a series of guides for larger or overweight persons looking for gear to get out and enjoy nature. Guides include eBikes for Heavier/Overweight Riders and RV’s for Larger People. If you have anything that you thing we should include in this guide, please email me at dbroer@lincon.com for consideration.


How to Make Cob Smoked Bacon

If you’ve ever had corn cob smoked bacon you know that it has the best flavor. It’s the old fashioned way of smoking bacon and it’s unfortunate that few places produce cob smoked bacon. The purpose of this Guide is help people that are looking to make their own cob smoked bacon at home. If you’re searching for how to make cob smoked bacon at home, it’s easier than you would think.

Equipment you will need

In order to smoke your own bacon you need a few things but once you have them, you will have them and be able to produce bacon when ever you need it. The equipment you will need includes:

  • A smoker
  • Amaze’n Pellet burner
  • 8-10″ Cast iron pan
  • Corn cob pellets
  • Pork Belly
  • Kosher Salt
  • Granulated Maple Sugar
  • Real Maple Syrup
  • Closable bag(s)

The Smoker

Unless you already have one, you’ll need a smoking apparatus to smoke your bacon. There are many options but I recommend the Masterbuilt MPS 230S. It’s a relatively inexpensive unit that gives you plenty of room for expansion and is a smoker that will work for people with different abilities so if you’re a novice, this is a smoker that can grow with you.

A-Maze-N Pellet Burner

Unless your smoker is specifically designed for burning pellets, you’ll need an A-Maze-N pellet burner that will produce a cold smoke from wood pellets. They have tubes and mazes that allow you to put your pellets in and produce smoke to smoke your meats. The 5×8 Maze will produce smoke for up to 9 hours so if you’re looking for a long burning time, that would be your choice.

To avoid the maze pellet burner sitting directly on top of the burner, you can place it in a 8-10″ cast iron pan.

Corn Cob Pellets

Of course if you’re trying to smoke something with corn cobs, you need the corn cobs to do the actual smoking. You can use dried corn cobs that will burn slowly but probably the easiest way is to use corn cob pellets. The key is finding pure ones. Cob smoking is not widely done so there are no retailers selling corn cob pellets for smoking meats but there are retailers who sell corn cob pellets for other purposes. The purest one that I know of believe it or not is sold as “horse bedding” at Tractor Supply. Their Best Cob Premium Horse Bedding is 100% corn cobs and are used by many smokers to smoke their meats with corn cobs. This would probably be your best alternative if you do not have dried corn cobs to burn.

Pork Bellies

Bacon is produced from Pork Bellies. Pork Bellies are the under belly meat of a pig and when you purchase one you get about 12-15 pounds of bacon at a cost of about $3-4/lb. When you consider that cob smoked bacon can sell for $8-20/lb, you’re saving a lot by making your own. We’ll talk more in a minute on how to prepare your pork belly for smoking it into bacon. To locate a pork belly, start calling around to local meat markets or butchers and ask for a Pork Belly. They will know what you’re talking about and can tell you what they have. If available, see if they have ones without the the skin. It will save you time later!

Prepping your Pork Belly

Now that you have all the “hardware” to make your cob smoked bacon, you need to prep the pork belly and cure it for smoking. Many people will recommend curing with nitrates or pink salt or something like that but that is totally unnecessary. The process takes about a week to prep your bacon so keep that in mind.

If your pork belly still has the skin on, you want to remove that so that the smoke can penetrate the meat. Use a filet knife or something similar and slice that off so you just have the meat. Leaving a little fat is OK but you want it mostly off.

In a small bowl combine together:

  • 1/4 Cup Kosher Salt
  • 1/4 Cup Granulated Maple Sugar (you can also use brown sugar)
  • 1/4 Real Maple Syrup (not the artificial stuff!)

Take this mixture and spread out on both sides of the pork belly. Carefully slide the pork belly into a gallon-sized zip-lock type bag and place it in your refrigerator.

Once a day for 7 days, flip over the bag with your pork belly.

On the 8th day, rinse off the pork belly and place it on a drying rack in your refrigerator and leave it overnight to dry.

Finally, How to Make Cob Smoked Bacon!

To smoke the bacon we are going to cold smoke the bacon which means we want smoke flowing over the meat for about 4 hours and a temperature between 75 and 90 degrees. Under most circumstances you won’t need to ignite your burner in your smoker unless it is very cold outside. The heat generated by the pellet maze should be enough to keep the temperature around 80 inside the smoker.

Start by putting the corn cob into your pellet maze and then using butane or strong flame in the igniter hole on both ends, light the pellets. This might take a minute or two and you should see a small flame on the pellets. Let the pellets burn for several minutes before gently putting the flame out. Smoke should roll off of the pellets and the maze should be ready to go.

You can either lay the pork belly flat on a rack near the top of the smoker or hang it from a bacon hanger. If you lay it flat, you’ll need to flip the bacon over about two hours into the smoking process. The bacon needs to be smoked for a total of four hours. I recommend a ThermalPro TP-17 dual probe thermometer which would allow you to accurately monitor the interior temperature of your smoker as well as the temperature of the bacon to complete the smoking process.

At the end of the four hours of smoking you want to put your burner on low and keep the internal temperature below 180 degrees and monitor the temperature of the bacon until it reaches 140 degrees. This should take about an hour.

Once the bacon reaches 140 degrees you can remove it from the smoker. Place the meat in a refrigerator and allow it to cool completely before slicing for best results. Cooling the meat makes it easier to slice but you can also slice it off the smoker if you just can’t wait. 😉

It’s a long process but in the end I think you will find this to be the best tasting bacon that you’ve ever had!


Easy Minecraft Build Ideas

Are you looking for some easy Minecraft build ideas? Look no further! Scroll through some of these suggestions for designs that are easy to build in Minecraft. They are great beginner Minecraft build ideas. If you have any suggestions, please send them to us at dbroer@lincon.com and we can possibly feature them here! These simple Minecraft build ideas are part of our guides available on LincOn.com.

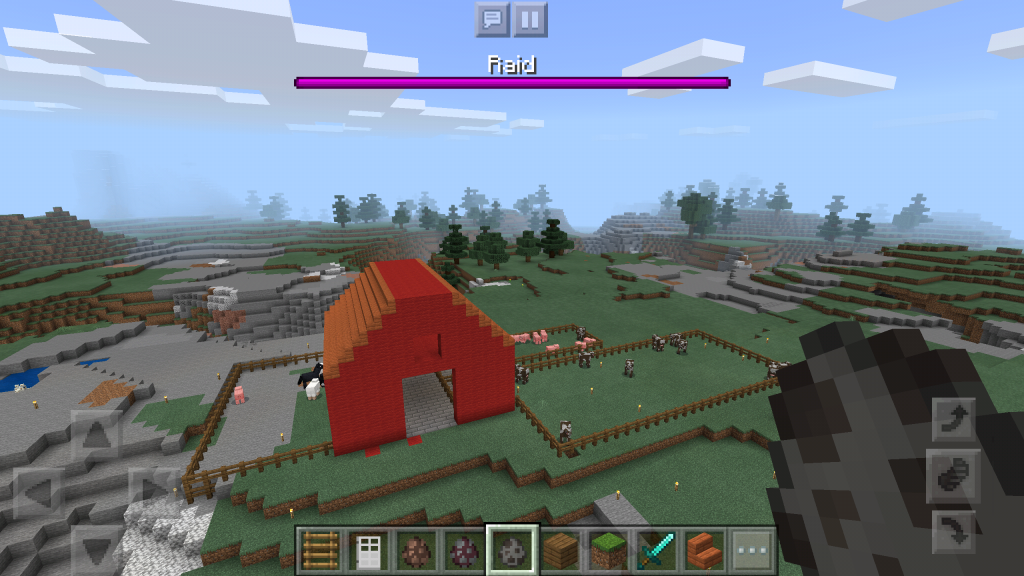
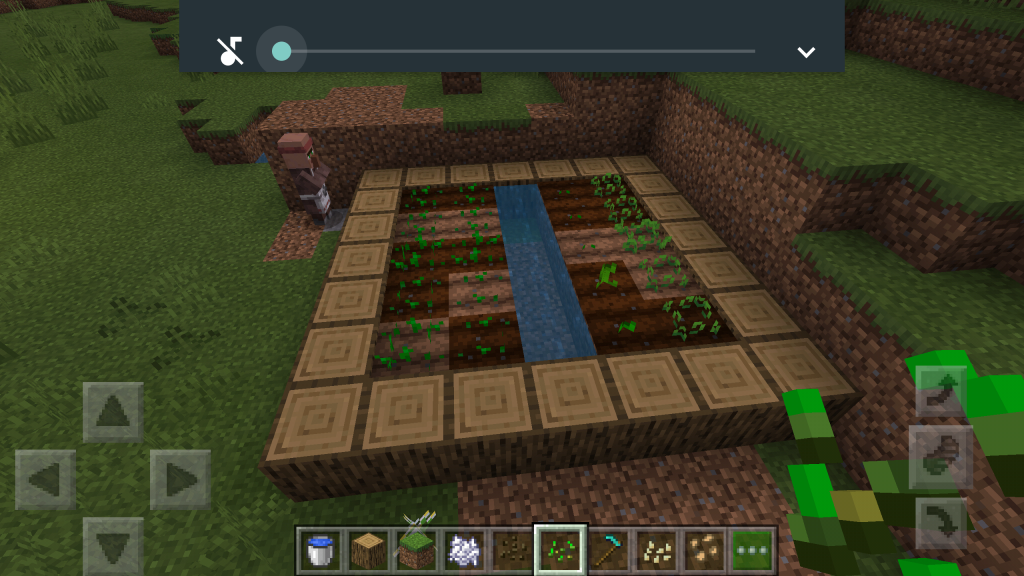
Here’s a small homestead and farm that you can easily build in Minecraft. A house with a glass wall was built to allow you look out of the house into the river valley. The homestead includes a pool, a barn with a loft and pens for animals that complete the scene.

A simple homestead that can easily be built in Minecraft.

Here’s a little close-up of the barn and animal pens on the homestead. Red wool was used to build the walls. A loft was added and the side walls open up to outside pens for the animals.

A close-up of the barn and animal pens on the Minecraft homestead.
The inside of the barn. Here you can see the stone floor and the individual pens for all the different Minecraft animals!


Covid-19 Official Information Sources

The following are links to resources for covid-19 official information sources. These resources are from all 50 states’ official sources of information for the Covid-19 virus. Your main place for information about the covid-19 corona virus should be the CDC’s Coronavirus (COVID-19) site.

Covid-19 Virus

State’s Official Covid-19 Sites

John’s Hopkin’s is maintaining a realtime map and update of the current covid-19 cases, deaths and recoveries.


Remote work tools

More people are working remotely these and employees need remote work tools that allow them to connect with one another, their employer and customers. This guide will help you find remote work tools that are free or cost effective.

Free Tools

You might think that remote work tools come at a cost, there are tools that let you work remotely and stay connected to your business for free. Below is a list of tools that will allow you to work remotely and stay connected.

Remote Workstation Access Tools

One of the most important aspects of working remotely is being able to connect with your workstation in the office and gain remote workstation access. While there are tools like GoToMyPC, they cost money, however, Google actually has a tool called “Remote Desktop” that lets you remotely access your workstation from any browser. It’s a Chrome Plugin that is protected by a six digit PIN behind your Google account. All you need to do is go to https://remotedesktop.google.com/ and it will pull up a list of workstations that you have installed this on. This tool also works to provide remote support to your clients. They also can go to this site and you can remote into their workstation.

Alternatively you can use Teamviewer. Teamviewer allows you to remotely access your workstation but it is limited to non-commercial use. This might only work for a non-profit organization. If you do any commercial activity, they can limit your account so be careful!

Share your Desktop

Do you have a need to share your desktop or make a presentation with multiple people? There are free tools for that as well. One of the most popular is Zoom. Zoom has free plans as well as more expensive plans. The free plans allow for clients and partners you view your desktop or allows you to view their desktop. This is a great way to collaborate!

An alternative to Zoom is Skype. Skype allows you to have video conference calls for free with multiple people. It also allows you to share your desktop as well. This is another great way to collaborate with your partners!

If the free plans at Zoom or Skype do not meet your needs, you can alternatively look at join.me. They have plans that are slightly cheaper than Zoom’s higher plans but would do the same thing.

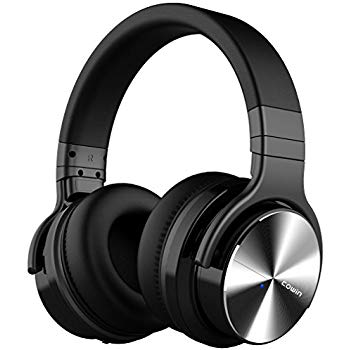
If you are doing a Web conference, I highly recommend using a headphone and microphone. A pair like the Cowin E7 is one of the most highly rated pairs and are worth consideration.

Free Conference Calls

If you need to host a meeting with a number of people and don;t need to share your screen, there are ways to host free conference calls. FreeConferenceCall.com offers free conference calls. They also have high plans but if all you need is a conference line, this should work. There are other providers as well if you do a search you will find others.

Low cost remote work tools

If the free tools are too limiting for your needs, there are several low cost tools that you can use to meet your needs. We’ve already covered some low cost alternatives to remote desktop access, desktop sharing and conference calls above but those aren’t the only tools you need to work remote.

Low Cost Cell Phone Plans

We’ve covered this in another guide but Visible Wireless is a cell phone company owned by Verizon that uses Verizon’s cellular network but gives you truly unlimited data. It’s only 5Mbps but that’s a lot faster than Verizon or AT&T after they throttle you down. It’s as low as $25 a month and you can connect a phone to a wireless router as we explained in our guide and this will allow you to connect multiple devices.

While that 5Mbps might seem like a slow connection, it’s more than enough to stream a full HD TV show and for a video conference. So take a look at our guide and see how you can get unlimited data for just $25 a month!

Remote work accessories

To be successful in working remote, you’ll need some remote work accessories such as headphones, desktop accessories and some computer peripherals.

Remote work tools such has these Cowin E7 noise cancelling headphones can make your virtual office work a success.
Cowin E7 Noise Cancelling Headphones with Microphone

One of the highest rated headphones with a microphone is the Cowin E7 noise cancelling headphones. This over the ear design will give you a more immersive experience and allow you clearly hear conversations and for your participants to clearly hear you as well. That’s key for a successful conference call or Web conference.

Another tool that you will need is a Webcam. Webcams come pre-installed on many laptops and tablets. Having said that, sometimes it’s nice to have a camera separate from your screen. It frees you up and gives you some freedom as to where the camera is placed. The LarmTek 1080P Webcam is one of the best sellers that you might not have heard of. It has a built in microphone and is highly rated by users so check it out. It’s one of the few Webcams that comes with a built-in cover for privacy when not in use.


Powerful Air Conditioners for Small Windows

Do you have a small window opening but need a powerful or large capacity air conditioner to cool a large space? This is a list of powerful air conditioners for small windows that will help you cool that space. Air conditioners that made this list are no wider than 30″ and no higher than 17″ and have more than 10,000 BTU capacity. This list is part of our Guides to help people.

Use the arrows to sort by the specification you need to find an air conditioner that will provide the BTU’s you need to cool your space.

[table id=1 /]


How to edit 360° Videos

360° videos can allow a user to immerse users into a place. Sometimes you capture more video than you want and you might need to edit some of the content. The problem is that using a regular video editor removes needed spatial metadata and the video will not display properly. This is where this guide on how to edit 360° videos comes to help.

Editing your 360° Video

You can actually edit your 360° video using any video editor but most editors don’t natively display 360° properly. You can still cut out the segments that you do not want and stitch the sections that you want to keep together.

Shotcut
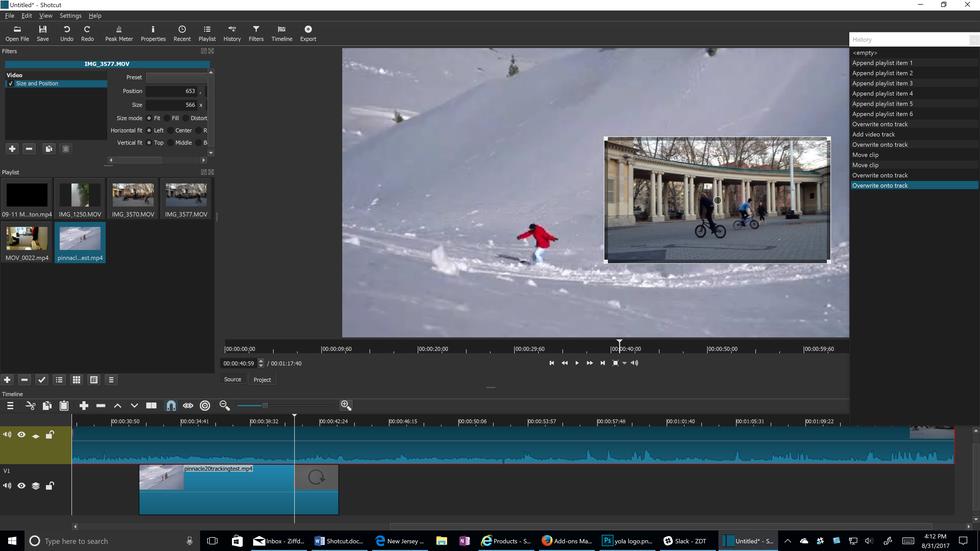
Shotcut

Shotcut is a powerful open source video editor and you can use that out of the box to edit the video just like you would edit any other video. After you open the video and put it in the timeline, find the part that you want to cut and click on the “Split video at play head” at the beginning of the section you want to delete and at the end. That should put the entire segment that you want to delete as a separate part. You can select that and press the delete key and viola! It’s gone. Finish by exporting the video.

If Shotcut is too complex, you can also use a tool like Avidemux to cut out the segment(s) that you don’t want to include. To do this, open the video in Avidemux, using the A->B buttons, select the beginning and end of the segments you want to keep. That will skip the parts that you don’t want. You’ll wind up with several videos that you’ll need to append together – open the first segment and then File>Append the other segments.

When you’re done editing your video, make sure you save it as an MP4 video. This, along with the spherical size, is what the metadata injector will be looking for.

Using the Spatial Media Metadata Injector

The key component before uploading your video to YouTube is using the spatial media metadata injector to put back the 360° video metadata.

The Spatial Media Metadata Injector

Start by downloading the Spatial Media Metadata Injector from Github. There’s really nothing to install so just copy the files to a separate folder that you can access. Run the GUI program and open your edited 360°. Press “Inject metadata” and it will create a new video and add the suffix “injected” to the video name. That’s the video that you want to upload to YouTube.

Conclusion

Hopefully this guide on how to edit 360° videos helps you produce cleaner 360°. Have fun!

360° Video of driving up Mount Mitchell


How to read a paper map

Paper map
Paper maps can be a very useful tool

Are Paper maps still a thing? Yes! Imagine a tool that you could hold in the palm of your hand and at a glance see the world around you. Imagine being able to look at detail in all directions and find interesting places to visit. Paper maps can do all of this and more! That is why this guide on how to read a paper road map exists!

Paper maps may seem archaic but they contain so much more information. They can be useful for navigation, finding places or looking at the big picture. The problem is that not everyone knows how to read a paper road map. That’s what this guide is for – to teach you how to find & use a paper map.

Where to find paper road maps

Welcome center
Welcome or Tourist Information Centers can be sources for free maps.

Years ago you could pick up paper road maps at any gas station. The companies that operated the gas stations wanted to encourage road travel so they had all kinds of maps. Sadly, that’s not the case any more. So where can find paper road maps in the 21st century? Just about anywhere.

While you could buy maps on a bookstore or travel store, a better approach is to go to places that have maps of the area. You can start with a tourist information center. This can be a local office or a dedicated center along an interstate or major road way. If you don’t see maps readily, you might have to ask.

Most states will have tourist information centers when you enter them or at least the nearest town will have one. They might have different types of official maps like bicycle route maps or even scenic routes. These places are a great place to pick up a free resource. It’s interesting to note that free maps will gain value over time. Save those official maps!

AAA is another great resource and you can pick up maps before you even leave on your trip. They have state maps as well as regional maps which can be great for planning your trip.

Opening the map up

Most paper road maps come folded to reduce their size. This allows a great deal of information to contained on a very large piece of paper. The first time you use a map, you might want to find a table. That way you can open that map up and orient yourself to it.

Once unfolded and laying flat, look at each side of the map. Most maps have a side that contains the subject matter of the maps title on one side and detailed maps on the other. Start by looking at the larger scale (more on map scales later). Look at roads, streets, highways and the different features. Follow these until you slowly start to figure out where you are on the map.

The Legend

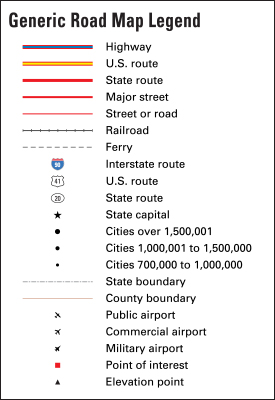
Generic Map Legend
Generic Map Legend

Once you know where you are on the map, look around the map until you find what is called the legend. The legend will tell you a lot of different things about the map. The legend will tell you what each road type is – whether it is an Interstate or limited access highway/freeway, a boulevard, street or road. Some maps might even tell you if a road is paved or not. It will tell you how to distinguish different parks. It will tell you what schools and churches are.

Map Scales

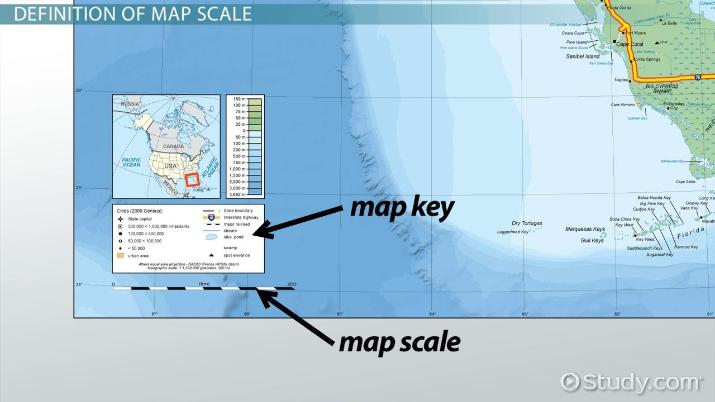
One of the more important things that a legend will have is the maps scale. The scale will tell you how far about things are on the map. For example, without knowing the scale, is 1″ on the map a mile or 20 miles? It’s important to know the scale of the map.

Map Scale
Map scales can usually be found near the legend.

The larger the map scale, the less detail the map will have. A large scale map like 1″=20 miles means they can only fit the detail that they can in that 1″ so not everything within those 20 miles will make the map. A larger scale can also be represented by other numbers such as 1:24,000 or 1:100,000. Just know that the larger the number, the less detail the map will have.

Large Scale = Less Detail Small Scale = More Detail

Planning a Route

Now that we know where we are and what different features are on the map, we can plan a route to where we want to go. Start by finding your destination or the first place that you want to stop.

Once you’ve located where you are going, look for major roads near you that head in the direction where your first stop is. Interstates or limited access freeways are your best bet because they don’t have traffic lights. Traffic lights can add 1-3 minutes every cycle so it’s best to avoid them. Try and find a combination or single road that can take you to your stop.

Once you’ve found a system of roads, orient the map so you know how to start on your route. Once we have that we can get started.

Using the map enroute

Folding the map

Before we start going to our destination, you should fold the map to allow you to quickly look at it if you need to make adjustments. The easiest way to do that is to find a center point between your starting point and destination and then fold in all the foldable sections that are outside of this zone. Start with the narrow sections on the left and right and then fold down the larger sections on the top and bottom. If this section is still too large, fold the map in half so you can flip it over when you are half way. You might also find that even that is too big if you’re on a very long try so just fold it so it is a reasonable size and unfold it as you make stops.

Using a map can be a great tool along with a GPS and Waze

Along the way you can pick up the folded map and see where you are relative to your destination and places you might see along the way. Let’s say you’re travelling down an interstate and you need a rest area. You could wait for a blue “Rest Area” sign to show up but you can also look at your map and see when the next one will be. You can also see where larger towns are along your route if you’re looking for food or lodging.

Driving tips with the map

In an urban area, it might be best to either have a passenger help guide you or supplement the directions you obtained earlier by using a GPS or other wayfinding tool. The map will still give you the larger picture and you can always reference it at traffic lights but at least you’ll have it to keep the GPS honest and on a safe route.

The map can tell you all kinds of information like how far it is to the next larger town or how much further you have until you’re outside of the city. It can tell you what exit you need if you want to stop at one of these places and it can tell you where you can find places of interest along the way.

Using GPS or Waze with your paper map

Waze, along with a paper map is strong combination.

You might think that you have to use either a paper map or an electronic map for your navigation but that’s not the case. Using both gives you information like exactly how far it is to your destination or the best route to take to avoid traffic. Waze is the best app for that but it’s also good to have a paper map because sometimes those tools will take you a certain way just because a calculation shows it as being 1 minute faster than another. The problem is, it doesn’t take traffic lights or the fact that you might get stuck behind a slow truck into consideration. A GPS can’t tell you how long it is until the next rest area while a paper map can.

While you can pull up some information but it’s also a lot easier to lift up a map and find a place to stop before your destination. You can also use the map to check to see if the route you’re on makes sense. Why drive 30 miles out of your way just the interstate has a higher speed limit when you could take a straight road to your destination at a lower speed? Having a paper map can save you that time and money and provide you with more information along the way.

Conclusion

Hopefully this guide has helped you learn how to read a paper map. The combination of modern tools does not make using a paper map obsolete. Rather it makes using one a strong tool for getting safely and comfortably from point A to point B.

If you are looking to hit the road, but sure to check out our guides for RV’s and for getting great prices on hotels!


Health Topics A-Z

Check out our disease prevention topics and tools to help you and your family stay healthy. Use the Health Topics A-Z to find the latest information that you are looking for: