My Dog Has Crusty Scabs On His Back

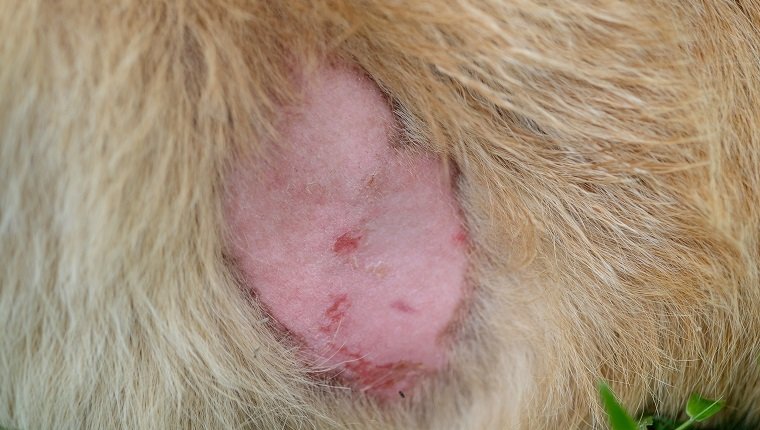
There are several causes of crusty scabs on a dog’s skin.  You are probably concerned that there is a skin problem, allergies, bacterial infection, fungal infection or even ectoparasites. 

Crusty scabs on a dogs back

What If the Crusty Scabs Are Caused By Allergies?

Allergies can certainly be a cause of the crusty scabs on your dog’s back.  Your dog might have an environmental allergy to pollen, laundry detergents, shampoos, soaps, cleaning products and lawn chemicals.  Food allergies can also cause skin problems in some dogs.  If you know there has been a recent change in your dog’s environment or food, you may first try removing the change to see if the crusty scabs heal.  For example, if you washed your dog’s bedding in a new laundry detergent and the dog immediately thereafter developed the crusty scabs, try rewashing the bedding in your old detergent. If after removing the recent change, your dog still has crusty scabs on her back, a veterinarian may need to prescribe an anti-allergy drug along with steroids or have you apply an ointment or lotion on the affected areas.

What If the Crusty Scabs Are Caused By a Bacterial Infection?
Bacterial skin infection on a dog

 A bacterial infection called folliculitis may be the cause of the irritation, bumps, sores and scabs on your dog’s back.  This can be caused by allergies, psoriasis, fleas or injury. A bacterial infection may occur when your dog is continuously scratching his skin, breaking through the layers of skin creating cuts where bacteria gains entry, develops an infection and causes puss-filled sores and crusty scabs. Causes of the itching could be external parasites. 

  1. Fleas:  Check your dog for fleas.  Look for an area where your dog’s hair is thin; under the arms, the groan or belly, then examine the area for very small black insects.  A dog with fleas can obsessively lick, scratch and chew at the skin which can result in sores.  A flea infestation can cause blood loss, which can lead to anemia.   
  2. Mites:  Mites can cause mange in a dog.  It is a common skin problem in a dog that produces similar problems caused by fleas.  If the skin condition becomes severe, your dog’s hair may fall out and the skin will be covered with crusty scabs.
  3. Ticks:  Ticks are an insect that will partially embedded themselves into your dog’s skin.  Most dog owners can remove a tick themselves.  There are several devices on the market made especially for removing ticks.  If you do not have one of these on hand, use a pair of tweezers, position them as closely to the dog’s skin as possible, firmly grasp the tick and pull out of the skin.  Be sure you have also removed the tick’s head.  If the ticks heads remains embedded in the skin, it can lead to infection.    

Additional Causes of Crusty Scabs on a Dog’s Back

  1. Fungal infection: A fungal infection called ringworm can result in red, irritated skin, bumps, scaly skin, itchiness and hair loss.  Puppies under a year old are most prone to this kind of infection.  Ringworm gets its named because it appears as a circular, ring-like patch of irritated skin.  Your veterinarian will want to see the dog and will prescribe an ointment.
  2. Hormonal imbalance:  Your veterinarian can diagnose a hormone imbalance if it is the cause of your dog having crusty scabs on her back. 
  3. Auto-Immune Disorder:  Whenever a dog’s immune system becomes compromised it cannot fight skin irritants, or the dog’s own immune system may be working against itself.  This can also cause crusty scabs, but needs to be diagnosed by your veterinarian.
  4. Nutritional Deficit: Your dog may not be getting all the proper minerals and vitamins necessary and develops skin irritation, itchiness, and rashes that lead to sores and scabs on your dog’s skin.  Your veterinarian will prescribe a specifically, balanced diet that is formulated for your dog’s needs.  This food will keep the skin healthy, moisturized, and coat glossy.
  5. Yeast Infection:  This is a common kind of skin problem.  Yeast is normally present on the skin of a dog’s body.  Problems occur when the yeast population builds up in a warm, moist place and causes irritated, itchy, discolored skin.  A dog will chew, lick, and scratch the skin causing sores and scabs.  Your veterinarian will diagnose and prescribe a treatment
Yeast infection on a dogs skin

Did you find this Guide helpful? Check out our other Guides for useful information on a wide variety of topics!



Is Watermelon Good for My Dog?

Yes!  Watermelon is an excellent source of vitamins and nutrients. It is also 92% water; which during hot summer months, helps keep your dog cool. Watermelon seeds and rinds, however, are not good for your dog and could actually cause serious health problems. So please, avoid feeding the seeds or rinds to your dogs.

watermellon
Watermellon

How is Watermelon Good for My Dog?

  • Watermelon contains potassium, vitamins A, B6 and C.  It also contains a healthy amount of nature plant fiber which is beneficial for your dog’s digestion.
  • Watermelon also contains lycopene which is a healthy antioxidant that helps prevent some cancers.
  • Watermelon is fat-free, low in calories, low in sodium (salt) and cholesterol-free.
  • Watermelon is also a fantastic source of water.  Giving your dog a snack of watermelon on a hot day will be refreshing and help prevent dehydration.

When is Watermelon Bad for Your Dog?

Eating anything in excess, even for dogs, is bad.  Watermelon should never make up a large portion of your dog’s diet.  If you give your dog an excess amount of watermelon, some dogs will experience diarrhea and other gastrointestinal upset.

When Is Watermelon Dangerous for Your Dog?

Watermelon should be removed from the rind (the outer part) before feeding the melon to your dog.  You will also need to remove as many of the seeds as possible, or purchase a seedless variety.  The rind is very hard, difficult to chew and could cause intestinal blockage in the dog. The seeds, especially for small dogs, may cause blockage, which can lead to serious intestinal problems.  Large dogs should not have any problems passing a few seeds, but it is best to remove as many seeds as possible.

What Are the Danger Signs If Your Dog Eats Too Much Watermelon or the Watermelon Rind and Seeds?

If you feel that your dog has eaten too much watermelon, or the seeds and/or rind, you will watch for:

  • Vomiting
  • Constipation 
  • Lethargy
  • Abdominal pain

If your dog develops any of these symptoms, consult your veterinarian for treatment.

Only Offer Natural Watermelon to Your Dog

Some products are marketed as watermelon flavored, but are in fact made up of entirely artificial products. These artificial products may contain sugars, chemicals, and other substances that can make your dog sick.  Artificial watermelon products frequently contain xylitol, which can be toxin to dogs.  Never feed your dog any foods with large amounts of sugar as it may cause gastrointestinal problems, obesity and diabetes.

dog eating watermellon
Dog eating watermellon

How to Offer Watermelon to Your Dog?

Watermelon can be a quick, healthy treat for your dog.  Remember to remove the seeds and rind before offering it to your dog.  Cut pieces of watermelon into cubes for an easy to eat treat.  Another satisfying way to offer a watermelon treat is to puree the watermelon in your blender.  Pour the puree into ice cube trays half-way, then fill the rest of the way with plain, low-fat yogurt and then freeze.  Do not use a yogurt full of sugars or other additives.  After the cubes have frozen, place them in a zip-top freezer bag and store in your freezer.  On a hot day, offer one of the cubes to your dog for a healthy treat.  If you want to make the watermelon cubes more delicious, you may add other safe and healthy ingredients like blueberries, lemon, and black salt. Lemon contains vitamin C, which is beneficial for the dog’s health in the hot season.

Hopefully you found this Guide helpful. Be sure to check out out other Guides!


How To Make Gyro Meat

By Gage Hanson

Gyro meat is delicious. The traditional Greek meat is often made with pork in Greece, but here in America is made out of a lamb-beef mixture. Either way, the seasoned meat, coupled with traditional tzatziki sauce and pita wrap, is delicious, but hard to find in small towns across the country. While you can find gyro restaurants in big cities, it is much harder to get a hold of gyro meat in smaller locales.

Gyro Meat
Gyro Meat

However, it isn’t too difficult to make your own gyro meat. Follow this recipe to find out how to make gyro meat. You’ll have a professional looking Greek gyro wrap in no time. 

            Ingredients:

            1 lb of ground beef

            1 lb of ground lamb

            2 cloves of garlic

            1 large onion

            1 tablespoon of marjoram

            1 tablespoon of oregano

            1 tablespoon of cumin

            1 tablespoon of thyme

            ½ tablespoon of black pepper

            2 teaspoons of kosher salt

Steps:

  1. The first thing you are going to want to do is to grind the beef and lamb together into a fine mixture. The meat is often put into a blender or food processor to turn the meat into a paste-like mixture. This will help the two meats mix together, let you integrate the gyro seasoning into the mix, and give you the ability to form the meat into the thin slices that gyros are known for.
  2. Mix all of the ingredients into the meat. To make authentic homemade gyro meat, you have to get the flavor right. Hopefully you have a fine paste of beef and lamb mixture that is easy to mix with the spices. If you used a food processor or blender, you can add the onion and garlic cloves into the mixture and use the processor to mix everything together. If not, you will want to chop and mash the onions and garlic so they will be easy to mix in without any noticeable chunks.
  3. Let the meat and gyro seasoning chill in the fridge for at least an hour in the bowl.
  4. Cooking the meat will remind you of cooking meatloaf, but this gyro meat recipe will be miles above the meatloaf you remember from dinner at grandma’s. You will want to get a loaf baking dish to spread the gyro meat out in. A 7×4 dish is the standard, but anything that fits your meat in a rectangular pattern will work.
  5. You will want to bake the meat at 325 degrees Fahrenheit for about an hour to an hour and fifteen minutes. Make sure the meat has reached 165 degrees on the inside.
  6. Remove the loaf and wrap it in tin foil and place it on a cooling rack. Place a pan on top of the loaf, or anything to weigh it down. This will help the meat become denser and get the desired gyro meat consistency.
  7. Cut the meat into thin slices and you are ready to add your tzatziki sauce, pita bread, and other serving options.

Tzatziki Sauce

A key part of any gyro meat recipe is the tzatziki sauce. It is easy to make and will take your homemade gyros to the next level.

            Ingredients:

            Half of a cucumber

            1 ½ cups of greek yogurt

            2 cloves of minced garlic

            2 tablespoons of olive oil

            1 tablespoon of white vinegar

            ½ teaspoon of salt

            1 tablespoon of minced fresh dill

Steps:

  1. Grate the cucumber and let it drain in a strainer overnight.
  2. Combine the yogurt, garlic, olive oil, white vinegar and salt. Let the mixture refrigerate overnight.
  3. Add the cucumber and fresh dill to the yogurt mixture.
  4. You are done! Add the tzatziki sauce to the gyro meat and enjoy.

Tips and tricks for your homemade gyro meat

Learning how to make gyro meat isn’t the only piece of the puzzle in your search for an authentic Greek meal. There are a few other steps to completing and amplifying the dish.

Gyros
Gyros
  • Puree the onion, garlic and herb mix before adding it to your gyro meat. This will help even out the gyro seasoning distribution.
  • Serve your gyros in a piece of pita that has been lightly grilled, and add sliced tomatoes, minced onions and lettuce. Some people will also add ketchup or mustard to their wrap. Include a side of french fries and your meal is complete.
  • A more traditional method of cooking includes grilling the meat on a rotisserie skewer. This is a more difficult option, but will cook the meat more evenly and add a good texture to it. You will want to leave the mixture in the refrigerator overnight so you are able to form it in rolls easier. Then you will grill the meat on medium-high until the internal temperature reaches 165.
  • Use your gyro meat to make gyro nachos. Instead of a pita wrap, combine your ingredients, including the tzatziki sauce, on top of a plate of chips. It is a great way to make a snack for game night or just a good, crunchy alternative to classic gyros.

If you enjoyed this recipe, be sure to browse through our other recipes.


How To Soften Cream Cheese

By Gage Hanson

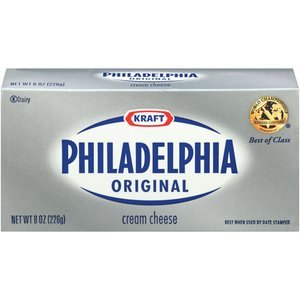
Cream cheese is a popular ingredient in a lot of different recipes. Whether you are making cheesecake, a cream cheese dip, cream cheese frosting, or even marbled brownies, you will need to use a stick or two of cream cheese. The problem with cream cheese is that it is tough to mix and hard to cut up because it is initially thick and very tough to work with even when it is barely chilled. That’s why you need to know how to soften cream cheese.

Cream Cheese
Cream cheese

            If you don’t have cream cheese that is soft all the way through, you won’t be able to work it into your recipe easily. You will have chunks of cream cheese that are still in your batter or mix that haven’t softened. Soft cream cheese is instrumental to create a smooth, enjoyable final product.

Soften Cream Cheese Ahead of Time

If you have your cooking plans made well ahead of time, then you will have plenty of time for the most simple way to soften your cream cheese. It only takes an hour or two of sitting at room temperature for a stick of cream cheese to soften thoroughly. You will want to cut through the brick or stick a spoon into the tub to make sure that the cream cheese is cool all the way through. Sometimes the center will stay stiff.

            A quick way to speed up the room temperature method and make sure the cream cheese softens equally is to cut the block into smaller squares with a knife. Divide the brick into fourths vertically, and then divide those smaller rectangles into another set of fourths horizontally. These smaller cubes will thaw more evenly and quicker. They will also mix into your recipe a lot easier, or spread easier.

Warm Water and a Bag

Fill a bowl or your sink with lukewarm water. You don’t want the water to be too hot or it will melt the cream cheese into a consistency that is too liquidy. Take your stick or block of cream cheese and put the amount you need into a watertight bag. Once the bowl or sink is full, place the bag of cream cheese in the water.

            You can let the cream cheese sit in the water for about ten minutes and it should soften all the way through. In larger amounts, you might need to test the cream cheese after the first ten minutes. If it is still stiff, let the cream cheese soften for another ten minutes. It should have reached the right consistency by then.

            This is one of the better methods I have come across for warming up cream cheese (and butter/icing/anything frozen) because it ensures that the cheese will be warmed all the way through. It isn’t very messy and it is easy to ensure the correct consistency because you can feel the cream cheese through the bag. It is a little more time consuming, but well worth the time to get the perfect cheesecake.

Stand Mixer

If you are using cream cheese to cook, there is a solid chance that you have a stand mixer on hand. If this is the case, you have another incredibly easy way to soften cream cheese and get it ready for mixing with other ingredients.

Stand Mixer
Stand Mixer

            Use the paddle attachment for your mixer to create a soft batch of cream cheese. Add the cream cheese and then mix it for about a minute. If you want a softer consistency, just let the mixer work its magic for a few more seconds. If you want cream cheese that is a little stiffer, take it out after 30 or 40 seconds.

The Microwave Method

Probably the easiest and most-used method for softening cream cheese is the microwave method. It is simple, quick, and most people have access to a microwave. This method is often used by bakers to soften or even melt butter, but it works just as well for cream cheese.

Microwave Oven
Microwave Oven

            Find a microwave safe dish (a bowl is usually a better option just in case the cream cheese starts to melt) and put your desired amount of cream cheese on the dish. You will want to set your microwave to about half power and set the timer for ten seconds. After the ten seconds are up, flip the cream cheese over and microwave it again for ten seconds. I definitely recommend specifically putting ten second into the microwave instead of typing in one minute and pulling it out yourself. If you get distracted, you will have a tough mess to clean up.

            All in all, there are a lot of different methods to soften cream cheese. Hopefully there is one here that will work for your situation and give you the perfect consistency. Enjoy these techniques and good luck on your next cream cheese cooking project.


Virtual Railfan

Are you a railfan? If you’re railfan and looking for ways to enjoy watching trains in your local area and in areas in other parts of the country and world, this comprehensive list should help. Enjoy this guide to virtual resources to watch trains from the comfort of your home!

virtual railfan
Raifan’s can watch trains virtually through live streams

United States Railfan Streams

Here are are some virtual railfan resources in the United States:

California

Tehachapi Live Train Cams at West Cable MP 357-358

Florida

New River Live Feed

Iowa

Ft. Madison, Iowa USA | Virtual Railfan LIVE

https://www.youtube.com/watch?v=Kc5ViXfb6x0

Illinois

Illinois Railway Museum Tower Webcam Live Stream

https://www.youtube.com/watch?v=LTyuKf2kkB0

Miller Station Live

https://www.youtube.com/watch?v=1aJ11Iy5yVw

Kansas

Lawrence, Kansas USA Train Cam

https://www.youtube.com/watch?v=f-kAmTtJ9Io

Kentucky

Hopkinsville Elevator / Solutions Technology Group

https://www.youtube.com/watch?v=K2PPsa90_pg

Norfolk Southern Crossing @ Rosemont in Lexington, Ky

Massachusetts

Boston, MA Live – Zakim Bridge

https://www.youtube.com/watch?v=ZDdvss1v-0Q

Chester Railway Station – LIVE

https://www.youtube.com/watch?v=3Xh9e-XI_cw

Westfield, MA LIVE

Michigan

Live 24/7 Downtown Bangor

https://www.youtube.com/watch?v=iSe0f9GSkdI

Minnesota

Perham MN USA LIVE Railroad ATCS Staples Sub Server mile post 189.5

https://www.youtube.com/watch?v=Na_oTdwTVXM

This is a live stream from the rail yard at Union Depot in Saint Paul. Amtrak’s Empire Builder travels through here.

Missouri

Santa Fe Junction – One of the Busiest! – Kansas City, Missouri, USA | Virtual Railfan LIVE

https://www.youtube.com/watch?v=3X4ReP_tAO8

Nebraska

Kearney, Nebraska, USA – Virtual Railfan LIVE

https://www.youtube.com/watch?v=cS2Gw3tts2Q

New Jersey

BigTrains.tv CP10 CSX River Line Bergenfield NJ Axis Q1765

Ohio

Deshler, Ohio USA – Virtual Railfan LIVE

https://www.youtube.com/watch?v=b5eIj7-j0is

Pennsylvania

World Famous Horseshoe Curve – Altoona, Pennsylvania, USA | Virtual Railfan LIVE

https://www.youtube.com/watch?v=jwE8kGx6UIw

Texas

LIVE Fishing Cam with Boats Railroad Trains Birds Galveston Texas

https://www.youtube.com/watch?v=P1tkPY9_mIQ

Virginia

Ashland, Virginia USA | Virtual Railfan LIVE

https://www.youtube.com/watch?v=KRkZGOp1jq0

Roanoke Rail Cam

Canada

Mtek Digital Live 50th Street and 82 Ave CP Rail crossing – Edmonton Alberta Canada

Japan

JR 中央本線ライブカメラ① (春日居町⇔石和温泉)上り新宿、東京方面向き

JR中央線 ライブカメラ 豊田駅~日野駅間 JR Chuo Line Toyoda~Hino Station train LIve Webcam,Japan,tokyo

Netherlands

Railcam Mierlo – Hout

Norway

CAB VIEW: Live chat and Stream from the Bergen Line, Norway

Singapore

Live: Woodlands Cam Live Stream

United Kingdom

Leek and Rudyard Railway

https://www.youtube.com/watch?v=QrN9bsiq7bw

Live UK Beach Cam Brunel Railway Dawlish Devon – San Remo Cam

https://www.youtube.com/watch?v=DpOSGVA2LEg


Does maple syrup go bad?

Does maple syrup go bad? Properly stored, no but it can undergo some changes. This includes crystallization and potential for mold forming on-top if given enough time.

maple syrup containers
Does maple syrup go bad?

Maple syrup is made from the watery sap produced by maple trees. This sap contains sugar that is stored in the roots and transported to to buds each spring. As the sap flows from the buds the sweetened liquid is collected and excess water removed to make the syrup. This means that it is just water and sugar and both don’t expire but they can become contaminated.

Maple Sugar Crystals

Crystals in a maple syrup container

The first way that syrup can go bad or become contaminated is with sugar crystals. This is actually perfectly fine and the syrup is still edible if you find crystals. Most syrup is made to a lighter density but at a slightly higher density it can crystallize easier. Don’t hesitate to consume it if you find crystals at the bottom of your container.

Mold on maple syrup

The second way that maple syrup can go bad is mold forming on the surface. This typically happens when the container was not properly packed or stored. You should not see mold on top of unopened containers, even if they have been sitting for years.

Mold on maple syrup
Mold on maple syrup

When the syrup is packed, it is heated to about 190 degrees and then decanted into containers and immediately closed. As it cools it vacuum seals and this vacuum should remain preventing mold from forming.

If the vacuum is broken and the syrup opened, it needs to be refrigerated to prevent mold from forming on the top. If it is left out, mold will form a few weeks at room temperature.

Some producers will advise consumers that they can skim the mold off the top and re-heat the syrup to 190 degrees but this is an older practice and it’s up to you if you want to try and recover your syrup. The syrup itself is still fine but many consumers don’t want to go through that.

Maple Syrup Expiration Dates

It’s true that some syrup containers will have expiration dates. These are mostly commercial brands that are a blend from Canada and from different producers sold in a grocery store. This does not mean that the syrup has gone bad. Grocery stores require expiration dates on all products so they can know when to rotate stocks but it doesn’t mean that the syrup expired or went bad.

Conclusion

Hopefully this helps and makes you feel more confident knowing that maple syrup does not go bad and what can happen to it. Be sure to check out our recipes that use maple syrup! If you have any suggestions for other Guides related to maple syrup, be sure to email Dave at dbroer@lincon.com.


How Long Does It Take To Learn Guitar

By Gage Hanson

Guitar is one of the most popular instruments in the world. The combination of portability, ease of upkeep, monetary investment and gentle learning curve make guitar an instrument of choice for a lot of beginners. However, it is no fun to buy an instrument and not be able to play anything interesting anytime soon. So the real question is: how long does it take to learn guitar?

Guitar Learning Goal

The first thing you need to do to figure out how long it will take you to learn guitar is set a goal for yourself. If you want to play guitar, you have to define what is an achievable milestone that will make you feel like a good, old-fashioned guitar player.

Playing the Guitar
Playing the Guitar

            You aren’t going to be an Eric Clapton anytime soon and you probably won’t be playing Wonderwall at your friend’s next house party. Setting a realistic goal will give you a reason to learn guitar, and to keep learning to reach that goal.

            If you want a goal that you can reach within a few months, set out to memorize the ten most used guitar chords. If this is what makes a guitar player, you can become a guitar player six weeks after you walk out of that music shop with your first Fender acoustic guitar.

 If you are more willing to extend the time period to six to eight months, set out to play a popular, but easy to learn song. “Three Little Birds” by Bob Marley, “Knockin’ on Heaven’s Door” by Bob Dylan, or “Perfect” by Ed Sheeran are a couple of easy to learn guitar songs with minimal chords. Any one of those could be mastered by a properly motivated beginner in only a couple months. Nothing says “I play guitar” like singing sweet Bob Marley ballads on a stone bench at your local park.

Basic Guitar Lessons

If you really are serious about learning guitar and want to keep the time period down to a reasonable amount, consider lessons. Lessons keep you motivated, give you an experienced teacher and help you develop a routine that will improve your skills an exponential amount.

Guitar Lessons
Guitar lessons will help you learn the guitar

            There are a multitude of online courses available for guitar lessons, but I highly recommend booking a teacher in your city. Simply googling “guitar lessons near me” will bring up tons of results of nearby teachers.

            As far as timelines go with basic guitar lessons, you will definitely improve a lot quicker if you attend 3-4 lessons a week and practice everyday in between. If you want to know how long it takes to learn to play guitar with lessons, the answer is the same as every other method: it depends.

Like any new skill, the amount you improve will directly be affected by the time you put in. If you only pick up your guitar once a week, it will take you a year to learn a basic song. If you fit seven playing sessions into every week, you will be reaching new milestones every few weeks.

Online Guitar Lessons

I’ve found that online courses are much harder to keep yourself motivated for. A lot of their main, beneficial selling points are also their drawbacks. The fact that they are so cheap means you are more willing to blow them off and lose the five dollars you paid for the online video. It is much harder to justify skipping a 35-dollar in person lesson.

Online Guitar Lessons
Online Guitar Lessons can help learning the guitar

Also, it is much harder to learn a physical instrument without a teacher to help you in a live setting. Video calls as lessons would help bridge this gap, but it still doesn’t replace a teacher being able to help you tune your guitar or properly show you where to place your fingers on certain chords.

However, if you are properly motivated, online lessons can help you learn to play guitar, although I would expect the timetable to increase by a few months at least. The lessons are bound to be less personalized (unless you are really shelling out the dough) and you will have to build your own lesson progression, which might not be as smooth as a teacher planning it all out for you.

As far as how long it takes to learn guitar using this method, If you are planning on using youtube and google to learn guitar, I’d give yourself around nine to ten months before you are fully comfortable with a range of chords and figuring out how to play multiple popular songs.

Guitar Learning Pathway

0-2 Weeks: Learn all of the basic parts of the guitar and the string names. This is also the step where you need to focus on building a solid foundation of music theory. If you don’t know the terms chords, progression or scales, you need to go back and get that knowledge. It will make every step from here on out easier.

2-4 Weeks: Learn how to read chord diagrams and memorize some of the major chords. If you google how to play a song they are going to tell you two things: the chords and chord progression. If you understand what they are saying and can play those chords, you are already well on your way to becoming a guitar player.

4-8 Weeks: Learn basic riffs and continue to work on chords. The riffs will help you familiarize your fingers with the movements necessary to learn more advanced songs. Chords are going to be more difficult because you have to put multiple fingers on multiple strings, but riffs will give you the practice of moving your fingers quickly. They will also help etch the names of all the strings and notes into your head.

8-12 Weeks: Learn some songs. Congratulations. You have now reached the point that you are a certified amateur guitar player. Open up that case, find a street corner and start raking in the dough. 

Hopefully you found this Guide helpful. Do you have any suggestions for Guides you’d like to see? email Dave at dbroer@lincon.com


How To Get Slime Out Of Hair

By Gage Hanson

Slime stuck in hair
Slime in hair can be a sticky situation!

Slime has officially swept the nation. There’s countless youtube videos on how to make slime. Every toy store is selling buckets of slime. Kids everywhere are making it. It is made from a simple concoction of Borax, baking soda, food coloring and glue. However, this simple recipe makes for a very sticky product. With kids that like to make messes everywhere, some slime may end up in their hair and leave their parents wondering how to get it out. Well, this short guide will help you figure out how to get slime out of hair.

Remove Slime With Conditioner

The simplest method is to remove slime with conditioner. You can find conditioner in most households, and you don’t need any special, high-end salon conditioner. Any old conditioner should help remedy the situation.

Conditioner can help
get slime out of hair

First, soak the hair in hot water. Then, apply the conditioner and make sure to apply the conditioner from the scalp to the ends of the hair. If you want to get rid of the slime, you need to make sure that the entire head is covered so the conditioner can help remove the slime from the hair.

This method is effective because the conditioner will naturally break down the elements of slime. After the slime is broken down, it will wash away easily. Some slimes might not be as easy to get out though.

Take Slime Out Of Hair With Food

Mayo and peanut butter are two key ingredients for sandwiches (hopefully separate sandwiches), but they are also useful tools when looking to take slime out of hair.

Mayonnaise
Mayonnaise

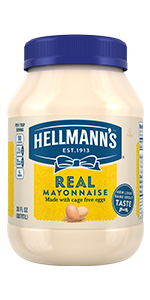
If you find slime stuck in a kid’s hair and the conditioner doesn’t cut it, grab a jar of mayonnaise and rub it in as if it was a bottle of shampoo. Using a brush or comb is a good idea too. This will help even out the mayonnaise and catch more clumps of slime.

Wash out the brush or comb as it collects the slime and mayo. Keep brushing the mayo into the hair with a comb and soon enough, the slime will start to break down into small enough pieces that can be easily washed out.

Peanut butter works in a similar way to get slime out of hair, but is tougher to wash out and should only be used when the slime is extra sticky.

Peanut Butter

The oils in peanut butter will act similar to the conditioner and break down any tough slime. Make sure to rub it into the strands of hair super well. Once your hair is evenly coated and on the verge of being ready for a layer of jelly, it is time to wash the peanut butter out with running water. The shower or sink will work great. Then, viola, your hair is slime free and you have a mostly full jar of peanut butter for snacking on.

Get Rid of Slime With Vinegar

If you’ve had to read this far on how to get slime out of your hair, you have some particularly hard to work with slime. Whether there was too much glue in the slime recipe, or your hair is extra thick, the slime just won’t break down and come out. Thankfully, we have vinegar. While you can get rid of slime with vinegar, it is a little bit trickier of a process.

Vinegar

To start off, you want to pull out the larger chunks of slime with your hand or a comb. These large chunks will keep the vinegar from properly applying across the entire head of hair. After the large chunks of slime are gone, you will want to apply the vinegar.

Apple cider vinegar and distilled white vinegar are both good options, but you will want to make sure to distill the vinegar in a two to one ratio with water. That means for every cup of vinegar, mix in a cup of water. Vinegar can be rough on your scalp and hair, so you want to make sure it is diluted so as to not damage your skin.

Put some goggles on—vinegar in the eye will sting, a lot—and start to apply the vinegar mixture. Rub it into the hair thoroughly and wash it out with warm running water. Your hair might give off a faint salt and vinegar chips smell, but now the slime will be gone.

Tips And Tricks For Slime Stuck In Hair

While these are the three main, and effective, methods for removing slime from hair. There are a few other tips and tricks for slime stuck in hair.

  • Wash your hair immediately after slime gets stuck in it. Dry slime is much harder to remove than wet slime. If you notice slime in you or your kids hair, grab that jar of mayonnaise and start spreading.
  • For children with sensitive hair, dilute your vinegar solution even more than the 2:1 ration. The acidic nature of vinegar is what makes it great for getting slime out of hair, but it can be damaging to someone with an extra sensitive scalp or fine hair. Diluting the solution more, and wearing goggles are even more important recommendations for children.
  • The slime might leave behind food coloring in lighter colored hair. Either wash the hair a few times with shampoo, or use a dab of rubbing alcohol on a paper towel. Rub the hair gently from top to bottom to remove the color. In extreme cases, you can use a color stripping shampoo to get the food dye out.

            Hopefully these methods solve your problem and help you figure out how to get slime out of hair. It may vary on a case to case basis as to which solution works best for you and your kids, but these are the main products and strategies to use. Good luck, and have fun sliming.

This is part of our Guides series. If you have any suggestions, please email Dave at dbroer@lincon.com.


How to make paper in Minecraft

Paper is a useful item in Minecraft. Paper can be used to make maps, banners and other useful items. To make paper you need sugarcane. It can also be found in looting chests such as those found in Shipwrecks or Cartographers chests.

How to make paper in Minecraft

How to make paper in Minecraft

Paper starts as sugarcane in Minecraft. Place three pieces of sugarcane on the crafting table and it will produce paper. The sugarcane can be found naturally along water edges and can also be farmed.

Where to find paper

In addition to making paper, paper can also be found in a few places as you explore around the world. It can be found in Supply or Map Chests in Shipwrecks, in Library Chests in Strongholds and in a Cartographers Chest in Villages.

Uses for paper

As I mentioned, paper has a number of uses. One of the primary uses is in creating an empty locator map but it can also be used to create different banners, books, maps and firework rockets.

Conclusion

Hopefully you found this helpful. This is our second Guide on Minecraft. We originally posted some simple design ideas that anyone could implement in Minecraft. If you have any tips that you would like to share, please email Dave at dbroer@linon.com.


How To Stop Eating Sugar

By Gage Hanson

How To Stop Eating Sugar

Sugar is everywhere in our modern diets. Soda is filled with it. Sugar coated desserts are offered every dinner. Candy is a common snack. Even Carbohydrates (breads), are sugar in disguise. And unfortunately, sugar is not that healthy for us. Sugar leads to obesity, diabetes and heart disease as well as a rollercoaster of glucose levels that our bodies aren’t naturally prepared to handle. However, as anybody who has tried a no sugar diet can tell you, sugar addiction is a real thing.

            Not too long ago in human history, we could only eat sugar when fruit was in season. Sugar wasn’t found in ancient diets. So how do we get back to these low sugar diets? How to stop eating sugar?

How To Stop Eating Sugar - Sugar Alternatives
How To Stop Eating Sugar –
Sugar Alternatives (Click to enlarge)

Sugar Alternatives

First off, you have to figure out what food has sugar in your diet and how you can substitute those items. The obvious is to cut out soda, candy and baked goods. Those are easy enough to find alternatives to. Water, vegetables and low-sugar desserts are alternatives that can be quick, easy and cheap. If prepared right, they can taste as good, if not better than their less-healthy counterparts.

            The less obvious sugary foods, bread, condiments, soup, granola bars, etc. are harder to find alternatives for. To substitute noodles, people often eat spaghetti squash. In place of buns you can use lettuce. You can find natural protein bars with minimal sugar.

            At the end of the day, it is really about how much you pay attention to the contents of what you are eating and how you can replace that. Get in a habit of keeping track of the amount of sugar you are eating and you will see how quickly it adds up. I personally like to use MyFitnessPal to track what I’m eating. It is good for seeing an overall breakdown of what you’ve eaten, including the amount of sugar, and setting goals for what you want to eat. A simple pen and paper would work just as well though. You can find the amount of sugar in anything on the nutritional guide on the packaging.

After that, it is only a matter of dropping the food items that top your list and replacing the rest with sugar alternatives. You can be as creative as you want. A lot of people on the keto diet craft some delicious foods void of all sugar. Or, you can go on a carnivore diet and stick strictly to steak for every meal. There’s so many no sugar diets out there that give you just as many options as you have with sugar.

Diet Motivation

The most difficult part of a low sugar diet is keeping it going. Like I mentioned earlier, sugar addiction is very real. A day or two off of sugar is no big deal, but imagine seeing a freshly baked blueberry muffin after not having an ounce of sugar for two weeks? It would be tough to resist. That’s why you have to have something to keep you accountable.

One of the most popular, and probably most effective, techniques at following through with your diet is going on it with someone else. If you have a best friend or significant other on the no sugar diet with you, then you have someone to keep you motivated in return for keeping them motivated.

Another popular technique is to give yourself a reward of some sort. Whether it is putting five dollars in a jar every day you stay away from sugar and then using that money for fun after a year, or using the money you will undoubtedly save after cutting out expensive, unhealthy food from your diet to buy yourself that pair of shoes or jacket you’ve had your eyes on.

A good technique that I’ve always used in fitness and dieting goals is to set realistic, short term goals. Instead of aiming for no sugar for six months, I aim for two weeks. Instead of losing thirty pounds, I aim for ten. Achieving these smaller goals week after week is a lot easier than chasing a huge goal that takes months, if not years, to reach. You will get discouraged. You will think you haven’t accomplished anything. The high of reaching these smaller goals again and again will keep you motivated.

How To Stop Eating Sugar - Motivation
How To Stop Eating Sugar – Motivation

Keep Going

Now, you are successfully on your no sugar diet. Whether to lose weight, fight illness, or simply to eat more natural, you are on the path. It is only a matter of continuing to fight the influences of society.

You will continually be bombarded with chances to fail. Every commercial break will bring and advertisement about the newest sugar-filled food. You will be invited out to eat at restaurants where most of the options are filled with sugar, grease and carbs. The grocery store will look like Willy Wonka’s chocolate factory.

It is only a matter of you building up your mental and physical fortitude. You have to continually tell yourself that you are strong enough to keep going and remind yourself why you’ve started this journey. Whether through some mantra or a daily notification on your phone, you have to keep yourself focused. It will only get easier as time goes on.

And if you cave, don’t think it is the end of the world. And definitely don’t think you have to start all the way back at day one. You just made one mistake. Get back up and keep going. One meal with sugar won’t ruin all the progress you made. If you slip back into eating sugar daily, you will ruin all the progress you made.

Figuring out how to stop eating sugar is easy. Following through with the plan is the hard part. With the plan I’ve given you, plus your own personal strategies, you will be able to cut sugar out of your diet and get healthier than you’ve ever been. Without sugar, you’ll be healthier than most of America.