Non-Alcoholic Beer

Beer is one of the oldest beverages in the world. It was one of the main sources of water before water purification was made available. The presence of alcohol killed bacteria or inhibited its growth. In modern times though, there are many reasons why someone might want to enjoy a beer without alcohol. Please enjoy Guide to non-alcoholic beer, how it’s made along with a list of some of the best non-alcoholic beers available. Some of beers available online without even having to go to a store!

Non-alcoholic beers like Brooklyn Breweries Special effects IPA are just as good any beer
Non-alcoholic beers like Brooklyn Breweries Special effects IPA are just as good any beer.

What is non-alcoholic beer?

Intoxicating beverages were defined by the Volstead Act as having less than 0.5% Alcohol By Volume or ABV. The Volstead Act is what propelled the United States into Prohibition which prohibited the production of alcohol for consumption. Beer with less than 0.5% ABV is considered non-alcoholic. Some non-alcoholic beers have 0.0% ABV contents.

Can under-21 drink non-alcoholic beer?

This depends on the jurisdiction. In some countries it is yes and in others yes. Here in the U.S. it depends on what state you are in. The following states do not restrict the sale of non-alcoholic beer containing less than 0.5% ABV:

  • Alaska
  • The District of Columbia
  • Hawaii
  • Illinois
  • Minnesota
  • New Jersey
  • Texas
  • Wisconsin

How is beer brewed without alcohol?

There are two main methods to remove alcohol from beer – vacuum and reverse osmosis. Both methods have been refined in recent years to produce beers that are just as good as their alcohol containing companions.

Vacuum Removal of Alcohol

Originally alcohol was removed from beer by boiling it to remove the alcohol. This left most beers with a watery flavor. In recent years though, brewers take advantage of the fact that alcohol boils at a lower temperature than water and even lower under vacuum. Beer is placed under a vacuum and very little heat is applied causing the alcohol to boil off at nearly room temperature. This leaves the beer with all its flavor intact.

Reverse Osmosis Removal

Another method for removing alcohol from beer is to filter the beer through a reverse osmosis filter. The beer is pumped at a high pressure through a membrane that only allows a water & alcohol molecule to pass through it. The water is then boiled to release the alcohol. This can also be done under a vacuum to reduce the amount of heat that is needed. The alcohol-free water is then added back the beer concentrate to packaged from there.

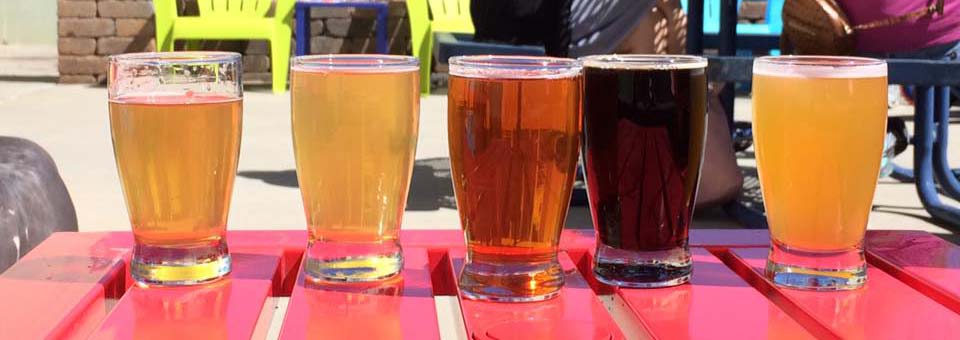
The best alcohol-free beers

Alcohol-free beer has been rising in popularity over the past few years and there are now many different choices for those looking to enjoy a beer without the intoxicating effects. Many are also available to be shipped to home!

Hellraiser Dark Amber is our favorite non-alcoholic beer.
Hellraiser Dark Amber is our favorite non-alcoholic beer
  • All Out Extra Dark – Athletic Brewing – This is an award winning dark beer from a brewery that specializes in non-alcoholic brews. Also available online.
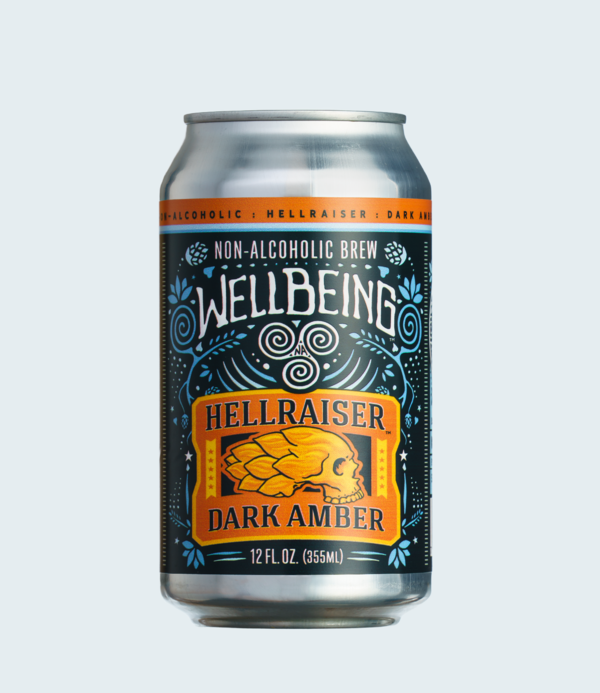
  • Hellraiser Dark Amber – Wellbeing Brewing – This is our favorite non-alcoholic beer. It tastes like a dark, rich beer. If you like the flavor of beer, trust us, this will deliver! It’s even available online.
  • Just the Haze – Samuel Adams – From the world famous brewery that started the microbrew boom. It’s a full flavored IPA beer that will satisfy.
  • Special Effects IPA – Brooklyn Brewery – If you’re looking for a lighter beer with a full beer flavor, this IPA will deliver!

Making Alcohol-Free beer at Home

Homebrewing is a popular way to make beer the way anyone prefers and this includes making the beer without alcohol. Non-alcoholic beer is made the same way as regular beer but will require an extra few steps to remove the alcohol.

Modern breweries use a reverse osmosis filter to separate the water with the alcohol and the concentrated beer. This water is then boiled under a vacuum to remove the alcohol. This process can also be done at home with a small reverse osmosis system and adding pure water to concentrate to avoid having to boil the water and alcohol.

The brewing process for any beer looks as follows:

  1. Malting – Barley is soaked in water allowing the grain to “sprout”. The sprouts are dried.
  2. Milling – Malted grain is ground to gritty consistency.
  3. Mashing – The ground malted grain is mixed with water and pulverized. The mix is then gradually heated to 75 °C (167 °F). The slurry is filtered to remove the majority of particulates. This filtered sugary liquid is called wort.
  4. Brewing – The wort is brought to a boil for roughly 1–2 hours.
  5. Cooling – The wort is filtered to remove the majority of the grains and hops and then immediately cooled.
  6. Fermenting – The wort is saturated with air, yeast is added in the fermentation tank. This step takes around ten days.
  7. Maturation – The freshly fermented and uncarbonated beer is placed into a conditioning tank and allowed to age.
  8. To remove the alcohol, the beer can be filtered through a reverse osmosis filter to remove the water along with the alcohol. Pure water can be added back to the concentrate.
  9. Finishing – The beer is filtered and then carbonated and moved into a storage tank for bottling or kegging.

Kits are available for anyone who wants to homebrew whether you are beginner wanting to try your hand at brewing or ready for something more advanced.

Athletic Brewing produces award winning non-alcoholic beers as good as any beer.

Conclusion

Beer is one of the oldest beverages in the world. In recent years the breadth and quality of beer available around the world has improved tremendously. This includes gluten-free beers as well as alcohol-free varieties. Do you have a favorite beer that are missing from our list? Be sure to contact us and let us know. We love hearing from people and making our guides the best available on the Internet.


Gluten-Free Beer

Beer is typically produced with wheat, barley and rye, all of which contain gluten. For those who live with Celiac Disease these are no-go ingredients than can cause major issue. Fortunately, for those with Celiac disease and enjoy a good beer, there are a number of gluten free beers that can satisfy their thirst. This Gluten Free Beer Guide should help you learn about what gluten free beer is, how it’s made and what are some top choices when it comes to buying a gluten free beer.

Holidaily Brewery is one of the few breweries that produces dedicated gluten-free beer.

Types of Gluten Free Beer

Just as with beer itself, there are several different varieties of beer that fall under the “gluten umbrella”. According to the Brewers Association, there are three categories of beer fall under this umbrella for those with gluten issues. They are Gluten-Reduced, Gluten-Free and Dedicated Gluten-Free beers. Here’s what each type means:

Gluten-Reduced Beer

A product cannot be labelled as gluten-free if it contains more than 20 parts per million of gluten. Since beer is brewed with barley, it contains gluten by its very nature. However, enzymes can be added that reduce the amount of gluten in the beer below the 20 parts per million. Brewers label these beers as “crafted to remove gluten”.

Gluten-Free Beer

A gluten-free beer is one that contains no gluten at all. They utilize ingredients like sorghum or rice syrup, buckwheat, millet and chestnuts to craft these types of beer. Because they contain no gluten that needs to be removed, they can be labelled as gluten-free beers. However, many (if not all) beers in this category are produced on the same equipment as other gluten containing beers. This introduces some risk for those at the highest risk of gluten allergies.

Dedicated Gluten-Free Beer

These beers have the lowest risk of containing any gluten because they are produced in facilities and equipment dedicated to being gluten-free and are not shared with any gluten containing beers.

Gluten Free Beer List

Seclusion IPA from New Planet Brewing

American Craft Brewers are second to none and produce the highest quality beers in the world. Thankfully this includes many gluten-free varieties including the follow.

Gluten-Reduced Beers

Gluten-Free Beer

Dedicated Gluten-Free Beers

The following breweries produce gluten-free beers in dedicated facilities and equipment:

Vanishing Point IPS from Ghostfish Brewing in Seattle is a dedicated gluten-free beer.
Vanishing Point IPA

Gluten-Free Beer at Home

Home brewing is another way to control the ingredients in a brew and allows you to ensure the taste and quality of what you produce. There are a number of kits that help facilitate brewing gluten-free beer at home:

Gluten-free homebrew kit.
A Home Brew Kit can be your ticket to a gluten-free beer


10 Places you can legally cross the U.S./Canada Border without going through Customs (Updated)

2025 Update: Due to political volatility, the information below is provided for information only. Please consult with local authorities or the Border Patrol on legal access to these special locations. This article is not legal advice.

Before 9/11 crossing the U.S./Canada border wasn’t that big of a deal. You still needed to be be officially checked in but in a lot of places (like Beebe Plain, VT) residents could easily cross without too much hassle. Now crossing the border can be a complex process, unless you’re just looking get on Canadian or U.S. soil temporarily and then there are some loopholes that let you do that without going through customs.

How you say? Well let’s just start with the fact that in all of these cases you’re entering the other country and then coming right back. You’re not staying and going that far. If you did, then you’d be breaking the law. However, you are technically in another country at that moment. So here’s 10 places you can legally cross the U.S./Canada Border without going through Customs. We’ll go from the east to the west.

The Aroostock Valley Country Club

The parking lot for the country club in Fairfield, ME is located in the U.S. but the club and the greens are in Canada. For U.S. residents you are allowed to play in Canada and technically be in Canada as long as you return to the U.S. This allows you to enter Canada, play a round of golf, interact with some Canadians and not have to go through customs. How many people can say they’ve played golf in two countries on the same day?

The Aroostock Valley Country Club allows you to be on Canadian soil without going through Customs

Escourt Station, Maine

Parc de la Frontiere allows one to go between the U.S. and Customs without going through Customs.

This is one of the places for Canadians looking to be technically in the U.S. without going through Customs. If you happen to be in eastern Quebec, you can head to the town of Pohenegamook. At the northern end of the aptly named rue de la Frontière you will find the again aptly named Parc de la frontière. There is an obelisk marking the border making it clear which side is Canada and which side in the United States. There’s a picnic table with a view of the river so you can spent time in both countries! There’s also a bathroom so they have thought of everything here.

Escourt Station, Maine has a place where Canadians can be temporarily in the U.S. without going through Customs

Pittsburg, NH – Fourth Connecticut Lake Hiking Trail

This one is a little trickier and you literally just walk past the Customs station and cross into Canada – several times! Care needs to be taken to park in the right parking spots across from the border crossing checkpoint. Walk along the fence and follow the signs to the hiking trail. You might even feel like you’re sneaking into the country just walking past the border patrol like that but don’t worry. Lots of people do this hike and it affords you the opportunity to be technically on Canadian soil while the trail meanders north and south of the border on it’s 1.2 mile journey to The Fourth Connecticut Lake which is the head waters for the 400+ mile long Connecticut River.

The Fourth Connecticut Lake Hiking Trail let’s you just walk past Customs and on Canadian soil.

The Haskell Free Library and Opera House – Derby Line, VT

This is probably the most famous place on our list. The towns of Derby Line and Rock Island sit next to each other, each on either side of the border. They’ve probably been more affected by the increased border security than any other place. It literally divides the same town. But, it gives us a unique opportunity in the Haskell Free Library. Park in front of the library (if there’s a spot available) and walk right in. Cross the black line on the floor and you’re in Canada. Literally just walk right in.

The Haskell Free Library straddles the U.S./Canada Border

East Richford, VT

This one is as easy as driving in. East Richford Slide Road in Richford, VT crossing the border for a decent stretch. There’s even the East Richford Cemetery where you could stop and take a walk around in Canada before returning back to the U.S.

East Richford Slide Road in Richford, VT crosses into Canada without a stop at Customs

Province Point, Lake Champlain

Here’s a second place for Canadians looking to be in the United States but it’s also one of those “can’t get there from here” type places. It is part of the United States that is only accessible by land from Canada. You need to cross private land to get there so this might be the hardest place to access on the list. According to reports, you can get there by walking but it’s not recommended. Visit at your own risk.

Province Point is part of the U.S. only accessible from Canada by land

Sault Ste Marie, MI

We jump west to Michigan for our next opportunity to cross into Canada without going through Customs. This is a water crossing and you’ll have to boarding a boat tour. The tour will take you out on the Saint Mary’s River and through both the American and Canadian locks. That means you’ll be in Canada while you go through the Canadian lock.

A boat tour of the Sault Ste Marie Locks will take you into Canada without going through Customs

Dunseith, ND – International Peace Garden

This one is a little different from all the others on the list. The International Peace Garden in Dunseith, ND gives people a unique opportunity to experience the border as an open garden. You can wander back and forth as you wish. It’s accessible from either Canada or the United States. To get there, you do have to pass by a Customs station and the entrance to the park is between the two. Once inside, you are free to roam about as you wish. If you want to be in Canada, be in Canada. Want to be in the U.S.? Go there! There are no Customs stations required. However, when you do leave, you will have to stop at Customs and report that you went to the Peace Garden so while you can cross the border without Customs, you eventually do.

The International Peace Park allows you to cross the border back and forth without stopping at Customs (while inside the park).

Portal, ND – Gateway Cities Golf Club

Here’s another opportunity to enter Canada, do some recreation and not have to go through Customs. It’s the second golf course on our list and let’s you tee off in the U.S. and putt in Canada. In fact, most of the course is in Canada but the club house is in the United States. Canadians will need to go through Customs to get to the clubhouse but American’s can play through!

Gateway Cities Golf Course is one of two golf courses in the United States that lets you play golf in Canada without going through Customs.

Peace Arch State Park – Blaine, WA & Peace Arch Provincial Park – Surrey, BC

This crossing is almost an honorable mention because unlike all the others there is police and Border Patrol presence in this park. You’ll also need to check ahead and verify that both sides of the park are open. The Washington and British Columbia parks are operated separately and have their own rules. When both sides are open you can cross from the U.S. into Canada and Canada into the U.S. without going through Customs. On the U.S. side you just need to cross the road to get to the Peace Arch at the border. Both parks do charge and admission fee.

The Peace Arch Parks give you the option of walking between the U.S. and Canada without going through Canada

Honorable Mentions

There’s some other quirky locations that are bits of land accessible only from one country or the other. I think they are worth mentioning to make this a comprehensive list of places where you can technically be in one country or the other without going through Customs.

  • Elm Point, MN – An exclave of the U.S., this spit of land is only accessible by land near Buffalo Point, Manitoba. There are no trails and the land is private. There’s also a small bit of marshy land to the west that is also technically in the U.S. but only accessible by water.
  • Hyder, AK – This is Alaska’s southern most town and it’s only accessible from British Columbia. You can enter without going through Customs but you’ll still need to check back in with Canadian Customs on the way out. So you can get there without Customs but not all the way
  • Niagara Falls, NY – It’s a shorter and more crowded version of the Sault Ste Marie Locks tour mentioned above but you can board a Maid of the Mist tour and be taken into Canadian waters.

Conclusion

Crossing the border is a big deal. You’re entering a foreign country. We’ve listed 10 (12 if you count the honorable mentions) places where you can technically cross the border and be on foreign soil without going through customs. However, your visit is very limited and not official. These are fun trivial places but you still need to follow the law if you plan on visiting either country. We have a great relationship with our neighbors and we should keep it that way!

Did we miss any places where you can cross the U.S./Canada Border without going through Customs? Email us! We’d love to hear from you. Check out our other Guides for helpful and fun information!


Massachusetts is South of Connecticut and other Geographical Oddities

Looking a map of the United States reveals some quirky oddities. For example it is possible to drive north from Massachusetts into Connecticut. We’ve all heard of different oddities like the Lake of the Woods in Minnesota or that Canada is south of Detroit. Here’s a list of some other improbably geographical oddities that you can check out next time you’re out traveling.

Driving South from Massachusetts into Connecticut

Everyone knows that Massachusetts is north of Connecticut, right? What someone told you that you can drive north from Massachusetts and enter Connecticut? Normally it would not be possible but there is a jog in the Massachusetts/Connecticut border that makes this possible. Looking at a map makes it look like this jog is a square but looking at it closely, it’s much more nuanced.

Map showing Connecticut being north of Massachusetts
Route 168 travels northeast/southwest between Connecticut and Massachusetts

The border follows the eastern shoreline of the Congamond Lakes but there is a causeway that divides the lakes and the causeway is angled northeast/southwest and route 168 crosses here. This takes someone driving on an easterly direction to more northeasterly in order to enter Connecticut.

New York is South of Vermont?

Everyone knows that Vermont is a New England state and that New York state is west of New England but that doesn’t mean you can’t travel south out of Vermont into New York. Vermont includes Lake Champlain all the way south to a point near Whitehall, NY.

Map showing New York state surrounded by Vermont.
Vermont extends north of New York south of Lake Champaign

This area extends into New York giving a traveler the opportunity to travel south from Vermont into New York state.

Part of Illinois is WEST of the Mississippi River

Here’s another geographical oddity. This one sounds a little crazy because Illinois is east of the Mississippi River but part of it did move west of the river in 1881. Flooding caused the channel of the Mississippi River to change leaving the town of Kaskaskia to be west of the Mississippi and the rest of Illinois.

Parts of Illinois are west of the Mississippi River
Part of Illinois is West of the Mississippi River

Kaskaskia is actually the original capital of Illinois before 1819 and was originally settled by the French in the early 1700s.

Montana is north of South Dakota?

Yes, most of Montana lies north of South Dakota but we typically think of North Dakota as the state that lies north of South Dakota but how about Montana? It’s true! Part of Montana extends east over Wyoming allowing a traveler to travel north from South Dakota and enter Montana:

Map showing Montana north of South Dakota
Montana extends east of Wyoming making it possible to travel north from South Dakota into Montana

Florida is West of Georgia

The next two are a pair of geographical oddities. I know what you’re thinking – Alabama is west of Georgia but what if I told you that part of Florida is actually west of it? For several miles in the Florida panhandle, Florida bumps north into Alabama, making it west of Georgia and not Alabama:

Map showing Florida west of Georgia
In this portion of the Florida Panhandle, Florida is west of Georgia

Florida is East of Georgia

I know we just demonstrated how part of Florida is due west of Georgia but it’s also true part of Florida is due east of Florida. So how can Florida be both east and west of Georgia? Easy! Over on the eastern side of Florida there is a jog in the Florida/Georgia border much like the Connecticut/Massachusetts border where part of Florida sticks north into Georgia around the Saint Mary’s River. Here it’s possible to travel east from St George, Georgia and enter Florida.

Map showing Georgia west of of Florida
Florida is both east and west of Georgia

Where else could you reach 5 states in under an hour?

No, we are not talking about smaller eastern states because technically there are single points where you could reach 5 states in an hour but there’s an easier place where you can do that – the Panhandle of Oklahoma. That port of Oklahoma is surrounded by 5 states making the feat much easier.

Map showing the 5 states within an hour of the Oklahoma Panhandle
The Oklahoma Panhandle is surrounded by 4 other states

Kentucky is West of Indiana

This is another one of those anomalies caused by bends in a river but while we think of Kentucky as being south a Indiana, it is possible to travel west in Indiana and enter Kentucky. The Ohio Rivers twists and turns to make the south border of Indiana and in Cannelton the river flows north giving us the geographical oddity that we can travel west across the river on route 69 and enter Kentucky to the west.

Map showing Kentucky west of Indiana
Route 69 travels southwest from Indiana to Kentucky

Texas is so big, it’s West of Denver

Everyone knows that Texas is big but it’s easy to forget how big it is. It’s eastern border is along the gulf of Mexico but many forget how far west the western border goes. Texas’s western border is so far west that it’s actually west of Denver and much of Colorado and New Mexico. It’s actually possible to make a day trip from Tucson to El Paso and back.

Map showing Denver is east of parts of Texas
Texas’s Western Border is West of Denver

Tennessee is East of Virginia

Tennessee borders 8 different states and shares that distinction with Missouri. It’s shaped like a parallelogram and most people think that Virginia is one of it’s neighbors to its north. While it does share a border with Virginia to its north, it’s possible to travel east of Tennessee and enter Virginia.

Map showing Tennessee is east of Virginia
East of Bristol the Tennessee border takes a jog to the north

Conclusion

So there you have it. 10 geographic oddities that you can explore and do things that normally you wouldn’t be able to. Check out our other Guides and informative articles!


How to play Minecraft PE Worlds on Minecraft Java Edition

Minecraft is the ultimate sandbox game and is available on multiple platforms including Pocket Edition (Minecraft PE). Minecraft PE allows players to play on the go where ever they are on their Android or iOS devices. This can lead a player to have different worlds on their mobile phone device and their desktop client. This guide will show users how to play Minecraft PE Worlds on Minecraft Java Edition on their desktop.

Required Utilities

Unfortunately there is not a single utility that can simply copy your Minecraft world from your mobile device to your Java Edition. The process involves different steps using the utilities below depending on what version you’re running.

Here are some utilities we’ll use in this guide:

  • MCPE Backup App – We’ll use this to copy the world on your mobile device into a zip folder
  • FX File Explorer – This will allow us to copy the backed up world to your Google Drive
  • Google Drive – We’ll temporarily store our Minecraft PE world here to copy to our Minecraft Java Edition computer.
  • Amulet – Minecraft World Editor and Converter
  • Minecraft Realms – Only needed if you need to move an existing MCPE World to the Java Edition on your desktop

Copy a NEW Minecraft PE World to Java Edition

Minecraft PE stores worlds in different places on your phone depending on how you have the app configured. To make a new world accessible so we can copy it to Minecraft Bedrock Edition we need to do the following:

On your Mobile Device

  • Open Minecraft PE
  • Click Settings > Profile – Change the File Storage Location to External. The default location is application
Minecraft PE settings for the File Storage Location where Minecraft will store worlds.
  • Create a new world
  • Open MCPE Backup
MCPE Backup Screen showing different worlds for backup.
  • Select the World you wish to copy to your Bedrock Edition
  • Open FX File Explorer and go to / > Storage > Emulated > 0 > MCPE
  • Select the folder with the latest backup file. You may need to open each one if there are several.
FX File Explorer showing MCPE Backup worlds from Minecraft PE
  • Press and hold the ZIP file with the World (it will have today’s date/time as part of the file name if you just backed it up). The “Cut, Copy Delete and three dot menu” option will appear on top of the screen
FX File Explorer menu showing options for sharing files.
  • Click the three dots menu and select Share
  • On the Share menu, select “Save to Drive”
  • Change the name of the file if you wish, otherwise select Save in the lower right

On your PC

  • After the file uploads/saves, go to your Google Drive, right click on the file and download it to your computer.
  • Open the folder and the ZIP file and copy the contents to a temporary folder
  • If the Minecraft version (1.16.5, 1.17, etc.) on your phone is different from your desktop version, convert it to the same version using Amulet – see below.
  • Copy your the World folder to C:\Users\AppData\Roaming\.minecraft\Saves – remember to replace the username part with your own PC username
  • Start Minecraft Java Edition and load the world.

Copying an Existing Minecraft PE World to Bedrock Edition

There’s a few more steps but it is possible to take an existing Minecraft PE World and move it to your desktop so you can play it on Minecraft Java Edition. To play an existing Minecraft PE world on Minecraft Java Edition, follow these steps:

On your Mobile Device

  • Open Minecraft PE
  • Click Edit (Pencil icon) for the World you want to transfer and select Play on Realm. This requires that you have a Realm account with Minecraft. Save and exit from the Realm
  • Click Settings > Profile – Change the File Storage Location to External. The default location is application
Minecraft PE settings for the File Storage Location where Minecraft will store worlds.
  • Back on the Realm, go into Settings > Backups
  • Click on the down arrow next to the latest copy to down a copy of the World.
  • Open MCPE Backup
  • Select the World you wish to copy to your Bedrock Edition
MCPE Backup Screen showing different worlds for backup.
  • Open FX File Explorer and go to / > Storage > Emulated > 0 > MCPE
  • Select the folder with the latest backup file. You may need to open each one if there are several.
FX File Explorer showing MCPE Backup worlds from Minecraft PE
  • Press and hold the ZIP file with the World (it will have today’s date/time as part of the file name if you just backed it up). The “Cut, Copy Delete and three dot menu” option will appear on top of the screen
  • Click the three dots menu and select Share
FX File Explorer menu showing options for sharing files.
  • On the Share menu, select “Save to Drive”
  • Change the name of the file if you wish, otherwise select Save in the lower right

On your PC

  • After the file uploads/saves, go to your Google Drive, right click on the file and download it to your computer.
  • Open the folder and the ZIP file and copy the contents to a temporary folder
  • If the Minecraft version (1.16.5, 1.17, etc.) on your phone is different from your desktop version, you’ll need to convert it to the same version using Amulet – see below.
  • Copy your the World folder to C:\Users\AppData\Roaming\.minecraft\Saves – remember to replace the username part with your own PC username
  • Start Minecraft Java Edition and load the world.

Troubleshooting

  • World is missing or not listed in Minecraft Java Edition – Make sure the world is the same version. The version of Minecraft – v1.16.5 or 1.17, etc. should be the same on the mobile device and the desktop installation. Try converting it through Amulet and copying the converted world to C:\Users\AppData\Roaming\.minecraft\Saves
  • World does not load – Make sure the world is the same version. The version of Minecraft – v1.16.5 or 1.17, etc. should be the same on the mobile device and the desktop installation. Try converting it through Amulet and copying the converted world to C:\Users\AppData\Roaming\.minecraft\Saves

Converting the World Version in Amulet

Minecraft is pretty sensitive to what version a Minecraft world comes from. Thankfully there are utilities that will convert a Minecraft World from one version to another. The best tool to to use is called Amulet. Amulet will convert any Minecraft version into another and vice versa.

  • Open your desktop version of Minecraft Java Edition
  • Create a New World. This will be our “target” world for the conversion. If you want to save a copy of this world, copy it from C:\Users\AppData\Roaming\.minecraft\Saves (changing “(your pc username)” to the username you use to log into the computer) and copy the world to another folder.
  • If you haven’t already, download Amulet and extract it to a folder.
  • Run amulet_app.exe and maximize the window
Amulet opening screen
  • Open the World that you want to convert
  • Click on the Convert tab on the left and then Select Output World
  • Select the new world you created above. Amulet will use this version to determine what version it needs to convert the source world to.
Amulet Convert screen showing converting one Minecraft PE (Bedrock) World version to another Bedrock version for play on a PC.
  • If needed, copy the world to C:\Users\AppData\Roaming\.minecraft\Saves
  • Open Minecraft and select the converted world

Conclusion

While many guides will say that it’s impossible or there’s no way to play your Minecraft Pocket Edition (MCPE) worlds on a PC, the steps above will show you how it’s possible to play Minecraft PE Worlds on Minecraft Java Edition. What are your thoughts? We’d love to hear them! You can contact us and share your thoughts on playing Minecraft on different platforms!


How to play Minecraft PE Worlds on Minecraft Bedrock

Minecraft is the ultimate sandbox game and is available on multiple platforms including Pocket Edition (Minecraft PE). Minecraft PE allows players to play on the go where ever they are on their Android or iOS devices. This can lead a player to have different worlds on their mobile phone device and their desktop client. This guide will show users how to play Minecraft PE Worlds on Minecraft Bedrock Edition on their desktop.

Required Utilities

Unfortunately there is not a single utility that can simply copy your Minecraft world from your mobile device to your Bedrock Edition. The process involves different steps using the utilities below depending on what version you’re running.

Here are some utilities we’ll use in this guide:

  • MCPE Backup App – We’ll use this to copy the world on your mobile device into a zip folder
  • FX File Explorer – This will allow us to copy the backed up world to your Google Drive
  • Google Drive – We’ll temporarily store our Minecraft PE world here to copy to our Minecraft Bedrock Edition computer.
  • Amulet – Minecraft World Editor and Converter
  • Minecraft Realms – Only needed if you need to move an existing MCPE World to Bedrock on your desktop

Copy a NEW Minecraft PE World to Bedrock Edition

Minecraft PE stores worlds in different places on your phone depending on how you have the app configured. To make a new world accessible so we can copy it to Minecraft Bedrock Edition we need to do the following:

On your Mobile Device

  • Open Minecraft PE
  • Click Settings > Profile – Change the File Storage Location to External. The default location is application
Minecraft PE settings for the File Storage Location where Minecraft will store worlds.
  • Create a new world
  • Open MCPE Backup
MCPE Backup Screen showing different worlds for backup.
  • Select the World you wish to copy to your Bedrock Edition
  • Open FX File Explorer and go to / > Storage > Emulated > 0 > MCPE
  • Select the folder with the latest backup file. You may need to open each one if there are several.
FX File Explorer showing MCPE Backup worlds from Minecraft PE
  • Press and hold the ZIP file with the World (it will have today’s date/time as part of the file name if you just backed it up). The “Cut, Copy Delete and three dot menu” option will appear on top of the screen
FX File Explorer menu showing options for sharing files.
  • Click the three dots menu and select Share
  • On the Share menu, select “Save to Drive”
  • Change the name of the file if you wish, otherwise select Save in the lower right

On your PC

  • After the file uploads/saves, go to your Google Drive, right click on the file and download it to your computer.
  • Open the folder and the ZIP file and copy the contents to a temporary folder
  • If the Minecraft version (1.16.5, 1.17, etc.) on your phone is different from your desktop version, convert it to the same version using Amulet – see below.
  • Copy your the World folder to C:\Users\(your pc username)\AppData\Local\Packages\Microsoft.MinecraftUWP_8wekyb3d8bbwe\LocalState\games\com.mojang\minecraftWorlds – remember to replace the username part with your own PC username
  • Start Minecraft Bedrock Edition and load the world.

Copying an Existing Minecraft PE World to Bedrock Edition

There’s a few more steps but it is possible to take an existing Minecraft PE World and move it to your desktop so you can play it on Minecraft Bedrock Edition. To play an existing Minecraft PE world on Minecraft Bedrock Edition, follow these steps:

On your Mobile Device

  • Open Minecraft PE
  • Click Edit (Pencil icon) for the World you want to transfer and select Play on Realm. This requires that you have a Realm account with Minecraft. Save and exit from the Realm
  • Click Settings > Profile – Change the File Storage Location to External. The default location is application
  • Back on the Realm, go into Settings > Backups
  • Click on the down arrow next to the latest copy to down a copy of the World.
  • Open MCPE Backup
  • Select the World you wish to copy to your Bedrock Edition
  • Open FX File Explorer and go to / > Storage > Emulated > 0 > MCPE
  • Select the folder with the latest backup file. You may need to open each one if there are several.
  • Press and hold the ZIP file with the World (it will have today’s date/time as part of the file name if you just backed it up). The “Cut, Copy Delete and three dot menu” option will appear on top of the screen
  • Click the three dots menu and select Share
  • On the Share menu, select “Save to Drive”
  • Change the name of the file if you wish, otherwise select Save in the lower right

On your PC

  • After the file uploads/saves, go to your Google Drive, right click on the file and download it to your computer.
  • Open the folder and the ZIP file and copy the contents to a temporary folder
  • If the Minecraft version (1.16.5, 1.17, etc.) on your phone is different from your desktop version, you’ll need to convert it to the same version using Amulet – see below.
  • Copy your the World folder to C:\Users\(your pc username)\AppData\Local\Packages\Microsoft.MinecraftUWP_8wekyb3d8bbwe\LocalState\games\com.mojang\minecraftWorlds – remember to replace the username part with your own PC username
  • Start Minecraft Bedrock Edition and load the world.

Troubleshooting

  • World is missing or not listed in Minecraft Bedrock Edition – Make sure the world is the same version. The version of Minecraft – v1.16.5 or 1.17, etc. should be the same on the mobile device and the desktop installation. Try converting it through Amulet and copying the converted world to C:\Users\(your pc username)\AppData\Local\Packages\Microsoft.MinecraftUWP_8wekyb3d8bbwe\LocalState\games\com.mojang\minecraftWorlds
  • World does not load – Make sure the world is the same version. The version of Minecraft – v1.16.5 or 1.17, etc. should be the same on the mobile device and the desktop installation. Try converting it through Amulet and copying the converted world to C:\Users(your pc username)\AppData\Local\Packages\Microsoft.MinecraftUWP_8wekyb3d8bbwe\LocalState\games\com.mojang\minecraftWorlds

Converting the World Version in Amulet

Minecraft is pretty sensitive to what version a Minecraft world comes from. Thankfully there are utilities that will convert a Minecraft World from one version to another. The best tool to to use is called Amulet. Amulet will convert any Minecraft version into another and vice versa.

  • Open your desktop version of Minecraft Bedrock Edition
  • Create a New World. This will be our “target” world for the conversion. If you want to save a copy of this world, copy it from C:\Users\(your pc username)\AppData\Local\Packages\Microsoft.MinecraftUWP_8wekyb3d8bbwe\LocalState\games\com.mojang\minecraftWorlds (changing “(your pc username)” to the username you use to log into the computer) and copy the world to another folder.
  • If you haven’t already, download Amulet and extract it to a folder.
  • Run amulet_app.exe and maximize the window
Amulet opening screen
  • Open the World that you want to convert
  • Click on the Convert tab on the left and then Select Output World
  • Select the new world you created above. Amulet will use this version to determine what version it needs to convert the source world to.
Amulet Convert screen showing converting one Minecraft PE (Bedrock) World version to another Bedrock version for play on a PC.
  • If needed, copy the world to C:\Users\(your pc username)\AppData\Local\Packages\Microsoft.MinecraftUWP_8wekyb3d8bbwe\LocalState\games\com.mojang\minecraftWorlds
  • Open Minecraft and select the converted world

Conclusion

While many guides will say that it’s impossible or there’s no way to play your Minecraft Pocket Edition (MCPE) worlds on a PC, the steps above will show you how it’s possible to play Minecraft PE Worlds on Minecraft Bedrock edition. What are your thoughts? We’d love to hear them! You can contact us and share your thoughts on playing Minecraft on different platforms!


Easy Hikes

Most people enjoy the outdoors and taking hikes in nature but sometimes you just want to take a leisurely walk and be bothered with long strenuous hikes. For some people who may not be in the greatest physical fitness health they want to get out but are not sure where they can go. That’s where this exclusive Guide to Easy Hikes comes into play.

For heavy, out of shape and over weight hikers, we’ve created Guides for hiking gear designed for heavier people. We’ve also created Guides for eBikes for Heavier Riders as well as regular bikes for riders over 350lbs. Hopefully this Guide helps people find easy walks in nature no matter where they are!

Criteria for Easy Hikes

This Guide focuses on hikes that are less than 2 miles round trip and has an elevation change of less than 200′. Most hikes are shorter than that and stay fairly flat but that’s where we draw the line for an easy hike.

If you know an easy hike that should be included on this list, please email Dave Broer at dbroer@lincon.com for consideration to add the hike to this list.

Massachusetts


Runway Markings

Any pilot needs to understand the markings around an airport, particularly runway markings. It’s important to understand runway markings so that you can avoid sensitive areas and operate according to FAA regulations.

Understanding runway markings is important no matter what type of aviator you are. Whether you are a passenger or a pilot – be that of a larger jet or a drone/UAV. In fact, UAV pilots testing for their Part 107 commercial license can be tested on runway markings so it’s important to understand what these markings mean.

Satellite picture of a runway with markings

Above is a satellite image of an a runway along with the taxiway and the markings on the runway. You can see a plane in the taxiway having moved from the terminal apron and it is making it’s approach to the runway.

Runway Diagram with Markings

Here’s a look at a runway and it’s diagram. You can see the same markings above on a real runway. Let’s start breaking down these markings to understand how a runway is marked.

Runway diagram with markings

The left most edge with the yellow chevrons is called the Blast Pad or Overrun Area. This zone is an area built at that the end of runway to allow for jet blasts or for planes that did not stop by the end of the runway. Use of the Blast Pad or Overrun Area for taxiing, take off or landing is not permitted.

Blast Pad marking on a runway
The Blast Pad or Overrun Area

The next section is the Displaced Threshold. Not every airport has one as you can see from the runway markings at the above airport. Displaced Thresholds can be used for takeoffs but not landings. However, landing aircraft can use the Displaced Threshold for roll outs.

Displaced Threshold marking on a runway.

Next up is the Runway Threshold. This marks the beginning of the runway available for landings. After the threshold is a runway number. The number represents the compass degree that the runway is orientated. In the example below, the “09” represents a runway oriented 90 degrees. In the real world example above the runway is orientated to 330 degrees. Optionally if there are parallel runways, the runway can be marked with an R, C or L for Right, Center or Left.

Runway Touchdown Zone markings

Following the runway name, the Touch Down Zone begins. It is marked by a series of Fixed Distance Marks. Down the middle is the Center Line and two solid white bars that mark the Landing Target Zone.

Taxiway enhanced markings

Just off the runway are taxiways that lead to the runway. It’s important to understand these markings as they connect with the runway. They are marked by parallel yellow lines and dashed yellow lines marking a warning zone to pilots that they are approaching the runway and that they need to stop unless they have obtained prior permission from the ATC to proceed.

Runway Regulations

Runway markings are highly regulated and consistent from one airport to the next. The FAA has a publication which outlines the markings and how they are to be done. In addition to runway markings, the regulations specify the taxiways, approaches and other markings at airports. Some regulations vary in different country, most are the same across the globe to provide uniformity.

Hopefully this guide has been helpful. It’s part of our exclusive Guides so check out out other exclusive Guides here on LincOn.com.


How to Reheat Steak Without Overcooking It

By Gage Hanson

            Warm, freshly-cooked steak is delicious. Cold, leftover steak not quite as much. However, there are a few methods of reheating steak that makes it almost as good as the original. These methods are all relatively quick and easy so you can enjoy your steak without too much of a drop-off because of time. Here is how to reheat steak without overcooking it.

Reheat Steak Just How You Cooked It

            One of the best ways to cook steak off of the grill is using both your oven and stove top. So why can’t you re-cook it the same way? The truth is, you can! You can reheat your steak without overcooking it by putting it in the over and then cooking it again in a skillet.

            First off, you will want to put your leftover steaks on a baking sheet. Turn the oven to 250-degrees and cook the sheets until they reach 110 degrees on the inside using a probe thermometer. This is going to take around 30 minutes for a standard 1 ½ inch steak, but you will want to adjust the time depending on the thickness and size of your steak. Depending on the situation, you should check the steak’s earlier for smaller ones and you can leave them in for a bit longer with thicker steaks.

reheating a steak on a skillet
Using an oven and a skillet, you can reheat steak without overcooking it

            After your steaks have reached the right temperature, you will have to remove them from the oven and prepare the skillet. Heat one tablespoon of oil on high in the skillet until the oil just barely starts to smoke. At this point, place the steaks in the skillet and sear both sides for 1-2 minutes until they are crispy. Remove the steaks from the skillet and let them cool briefly. Your steaks will have the consistency and taste of freshly cooked meat and should be roughly a medium-rare temperature.

Alternate Stove Top Method

            Sometimes you don’t have time to warm up the oven and let your leftover steaks sit for half an hour. For those of you with some beef broth in your pantry, you can use this to reheat your steak in a skillet and skip the oven method.

reheating a steak with beef broth
Reheating a steak on a skillet with beef broth will help prevent overcooking it

            You can put in as much beef broth as you want, it all just depends on how juicy you want your steak to be. The broth will be cooked into the steak as you are warming it up and add some moisture and juiciness back to the steak. Cook the steak on both sides with the broth until the internal temperature reaches 110 degrees again. Then, you will be able to enjoy a juicy and tasty leftover steak.

Classic Reheating

            The microwave may not be the first thing that comes to mind when reheating steak to make it taste as good as it did, but stay with me. The microwave is going to be the most convenient for you, and with a couple of simple hacks you can avoid the common disadvantages to using a microwave to reheat your steak.

            First, you will want to put your steak in a deep dish that is microwave safe. Secondly, you will need to pour some gravy, broth, or leftover meat juices into the dish. This will keep your steak from drying out and ensure that it tastes good and moist. Cover the dish with a lid or microwave safe plastic wrap and you are ready to move on to the next step.

            Now you can start the microwave. Turn the power level to half and cook the leftover steak in 30-second segments. Flip the steak over each segment to keep the heat spread out equally and avoid any cold spots in your reheated meal. Because you will be checking it constantly, this is a second good way to reheat steak without overcooking it.

            This technique won’t get the steak back to its original crispiness, but the added juice will keep the flavor and the heat should warm up your steak nicely. All in all, this is not a bad solution if you are in a hurry and don’t have too much time to warm up your meal.

Air Fryer

            An air fryer is a swiss army knife when it comes to kitchen appliances. It is great for cooking but is also a game changer when it comes to reheating food. From pizza to french fries, it can reheat almost any leftover, including steak.

using an air fryer to reheat a steak
Using an air fryer you can reheat a steak

            First, you should coat your leftover steak with some oil or some butter before you put it in the air fryer. Then, all you have to do is follow the same temperature and time instructions from the oven sections.

            Set the air fryer to 250 degrees and stick the steak in for at least 20 minutes and until it reaches 110 degrees on the inside. Check the steak every once in a while while it is cooking to make sure you haven’t fried it too much. The air fryer will cook your steak all the way through again and give it a texture very similar to when it came right off the grill. The oil or butter on top will help bring out the taste and keep the steak moist after it has been cooked into the meat. You can’t go wrong warming up most things in an air fryer, steak included.

            Whatever method you end up using, rest assured that reheated steak isn’t a bad idea so long as you learn how to reheat steak without overcooking it. You will have a nice, warm meal that tastes almost as good as it originally did.

This guide in one of our exclusive Guides. Checkout our other exclusive Guides found only here on LincOn.com.


How Do You Make Holy Water?

Water is made holy when it is blessed by a priest. After it is blessed, it becomes “Holy Water”.

Water and the Bible

Water has been important throughout Bible times.  The first book of the Bible, Genesis, speaks of water in the very second verse, “and the earth was without form or shape, with darkness over the abyss and a mighty wind sweeping over the waters. ”  Again, water is discussed in the second book of the Bible, the Book of Exodus, this time the Lord turns the very water of the river Nile and all the water in every bucket and pail in all the land of Egypt into blood when Pharoah refuses to release the Israelite’s from slavery.  These are only two of many, many references.  Over and over, water is important to our faith story.

In the New Testament, water again plays a pivotal role, this time in the baptism of Jesus.  The footnotes from the USCCB online Bible state, “the baptism of Jesus is the occasion on which he is equipped for his ministry by the holy Spirit and proclaimed to be the Son of God.” There are numerous other mentions of water throughout the Bible, Old and New Testaments, and we’ve established that it is important to our faith story.  Now let’s talk about water as used by the Catholic Church in the sacramental called Holy Water.

Holy Water bottle - how do you make holy water?
Holy Water bottle from Reliquary Supply

What is Holy Water?

Essentially, Holy Water is water that has been blessed by a priest for the purpose of making it holy.  The water that becomes Holy Water can be from any source of (perferrably clean) water.  Our particular Church has purchased gallon jugs of a local spring water just before the priest is going to bless water at the Easter Vigil or before a baptism.  Click this link if you would like to read the actual words said by a priest during a baptism and the blessing of the water for baptism

How Do You Make Holy Water?

Once the water has been blessed it becomes Holy Water and is therefore also considered a sacramental.  The definition of a sacramental can be found here.  Catholic Churches will have a font of Holy Water near entrances that is used by the baptized to bless themselves as they enter the Church.  As we enter our particular Church, there is a small metal bowl affixed to the wall that contains Holy Water.  We dip the first two fingers of our right hand gently into the surface of the Holy Water, then make the sign of the cross on our body.  By doing this, we are reminded of our own baptism into the family of Christ, as well as placing ourselves under the care of God.

What Does Holy Water Do?

By themselves, a sacramental such as Holy Water has no actual power to help us on the way to Heaven, but it does have the power to excite in those that use it rightly, a fear and love of the Lord, hatred of sin, and aligns our hearts toward God.

a home holy water font
A home holy water font

This guide is one ouf our exclusive Guides. Check out our other exclusive Guides found only here on LincOn.com